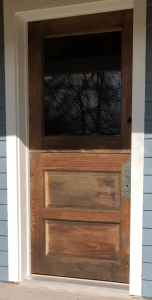
Today was the day to install the door. First we had to finish resizing the door. We decided to split up the work. My friend worked on the recessed panels, while I worked on the door rails and stiles.
The drawing on the left is to illustrate the intended final look of the door.
The door construction was based on a mortise and tenon joint. The tenon was not all the way through, nor was it the whole width of the rail. While reducing the length of the rails, I replicated the shape of the original tenons, so that the door frame would be constructed in a similar manner as the original door. However, while assembling the reduced door, I decided that needed more strength. To do this, I added 8-inch anchor screws (2 per rail). I used a 3/4 inch auger drill to counter sink the anchor screw and a 3/4 inch dowel to cover up the screw head.
The rails and the styles have an intricate profile on the edge where the panels are slotted in. Instead of trying to recreate the profile, I made sure to preserve the profile while disassembling the door.
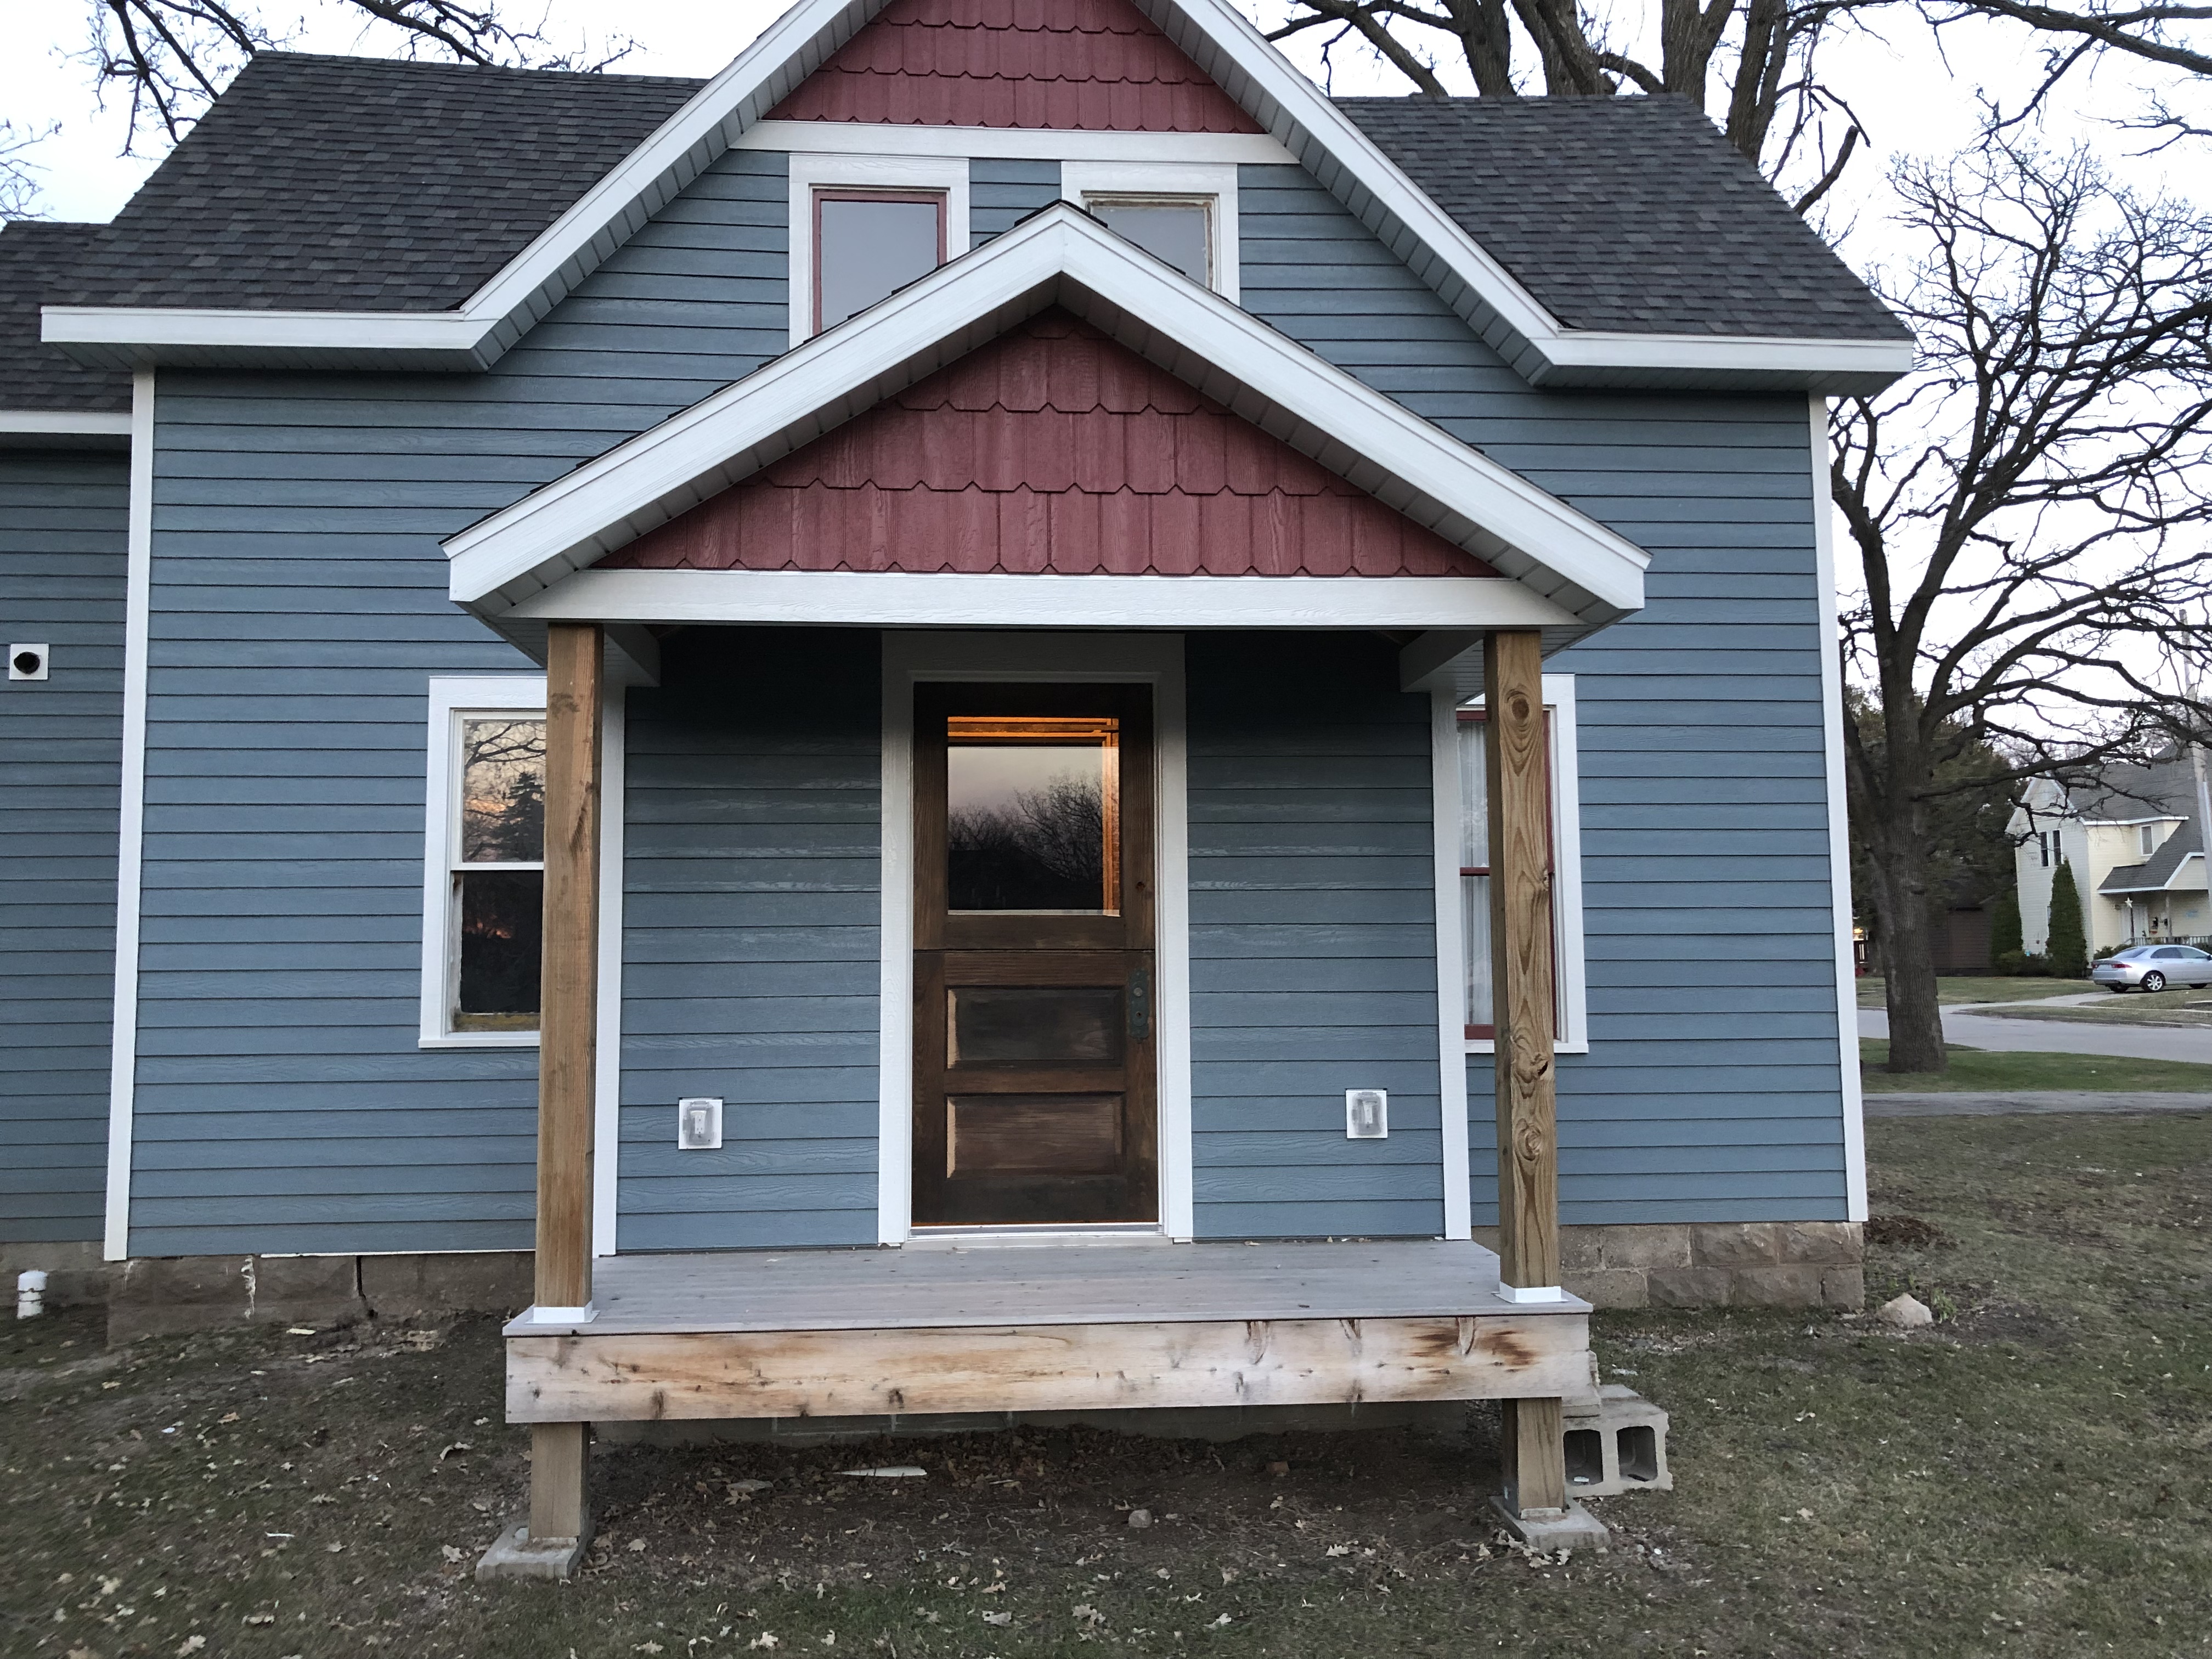
Emboldened by yesterday’s success to install the two windows, we decided that today, the Kenwoodstreet home needed to get a door opening on the Kenwoodstreet side of the house. In other words, the front porch needed a door.
A view of the Kenwood street side of the house, this porch needs a door. This picture was taken about a year ago.
This project is significantly more complicated than what meets the eye. Let me list the steps that I had planned for this project in my project spreadsheet:
Reframe the porch wall for a 36-inch door
Cut the hole in the porch wall for the frame.
Build the oak door frame, install the door frame and the trim.
Install the threshold, with the necessary flashing and water proofing.
Modify the 42-inch wide dutch door to become a 36-inch wide dutch door
Take the stile from one side of each door partition (dutch doors have a separated top and bottom partition, which can open separately.
Take 6 inches of each rail (5 in total), and ensure that the mortise and tenon connection is rebuilt
Cut the recessed panel, mimic the taper, put panel back in slot
Put the stiles back and secure with glue and a very long screw. Recess the screw head such that the hole can be covered with a dowel
Cut the glass of the top door section
Place and secure glass back into door
Mortise the frame to hold the 4 hinges (2 on top section and two on the bottom section)
Hang the door
Place door stops
Fix door lock, such that the door can be closed and locked.
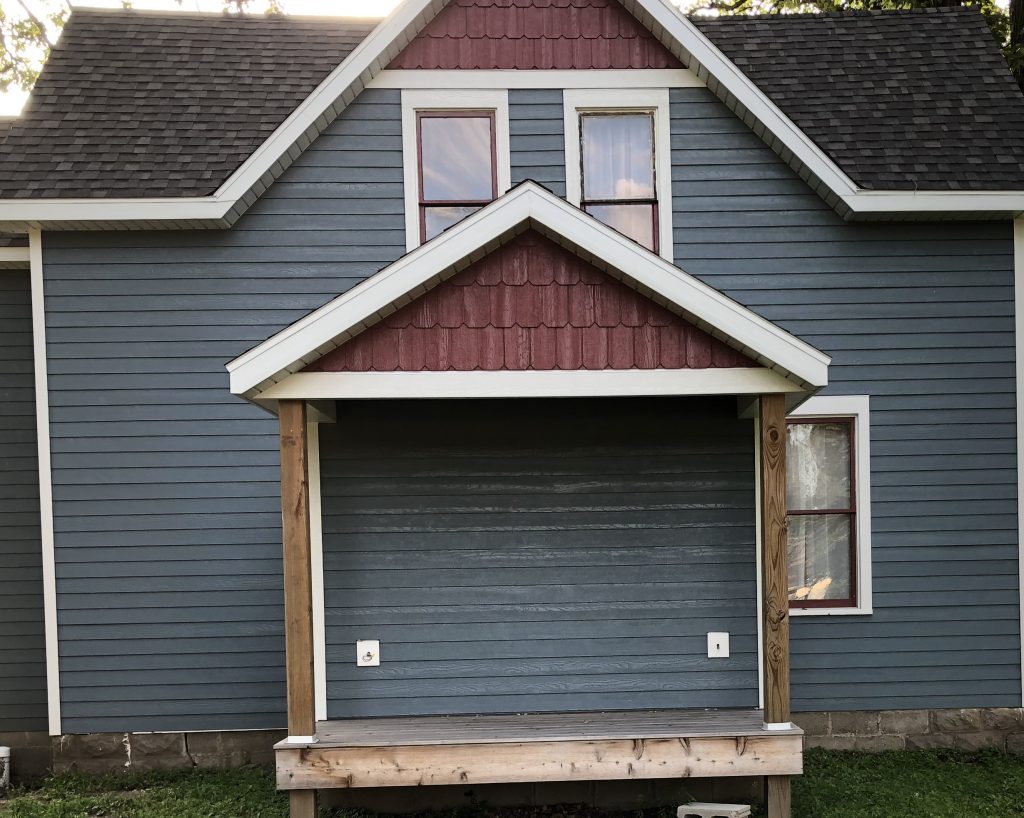
The other part of the project was to add windows in the porch, however, when we installed the door frame and the trim, we determined that there was simply no room to install the windows and secure the siding in between the windows and the door. The plan is now to add octagonal stained glass windows on each side of the door.
This day we only got to install the frame, the threshold and the trim. We did start the modification of the door to be 36-inch wide, but we ran out of time and out of steam.
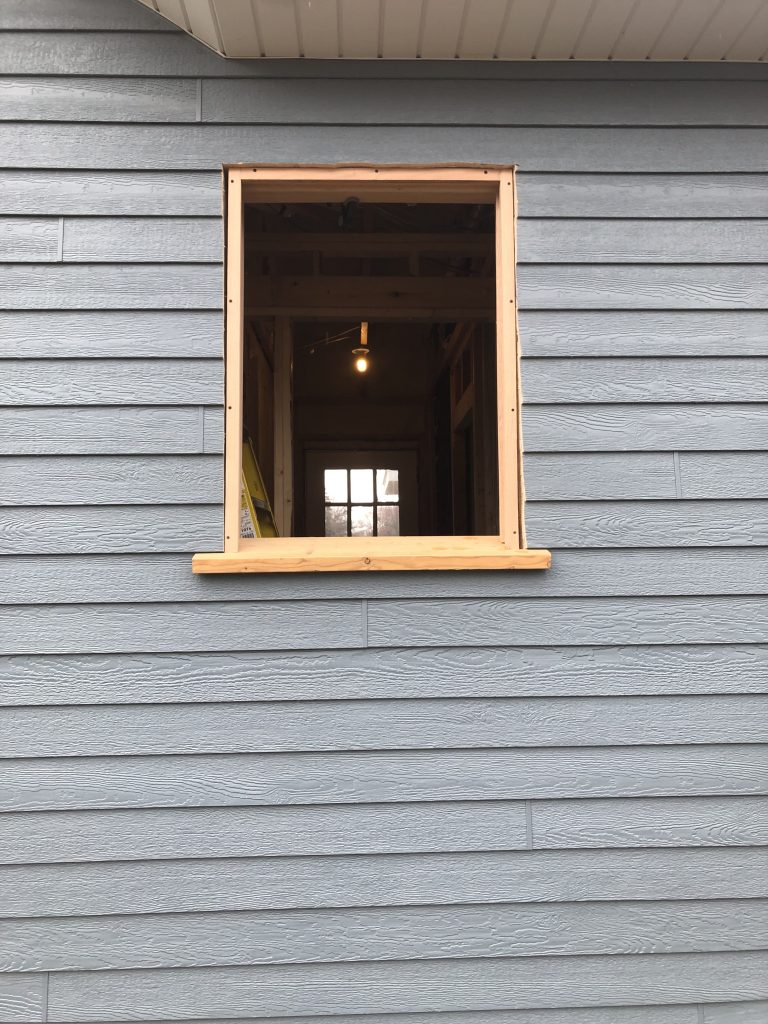
Big day today. It is the first time cutting through the siding and the sheathing to install the Powder Room and the Guest Bedroom windows.
The first hole is the size of the frame. Then, once the frame is dry fitted, it is time to cut the siding around the frame to accommodate the trim. The trim and the windowsill of the frame sit against the sheathing. The trim on the sides of the window is 3 1/2 inch wide and the trim on the top is 5 1/2 inch plus a drip-cap. Below you can see the progressions on both the powder room window and the guest bedroom window.
Dry-fitting the frame in the newly cut opening, this is the powder room window.
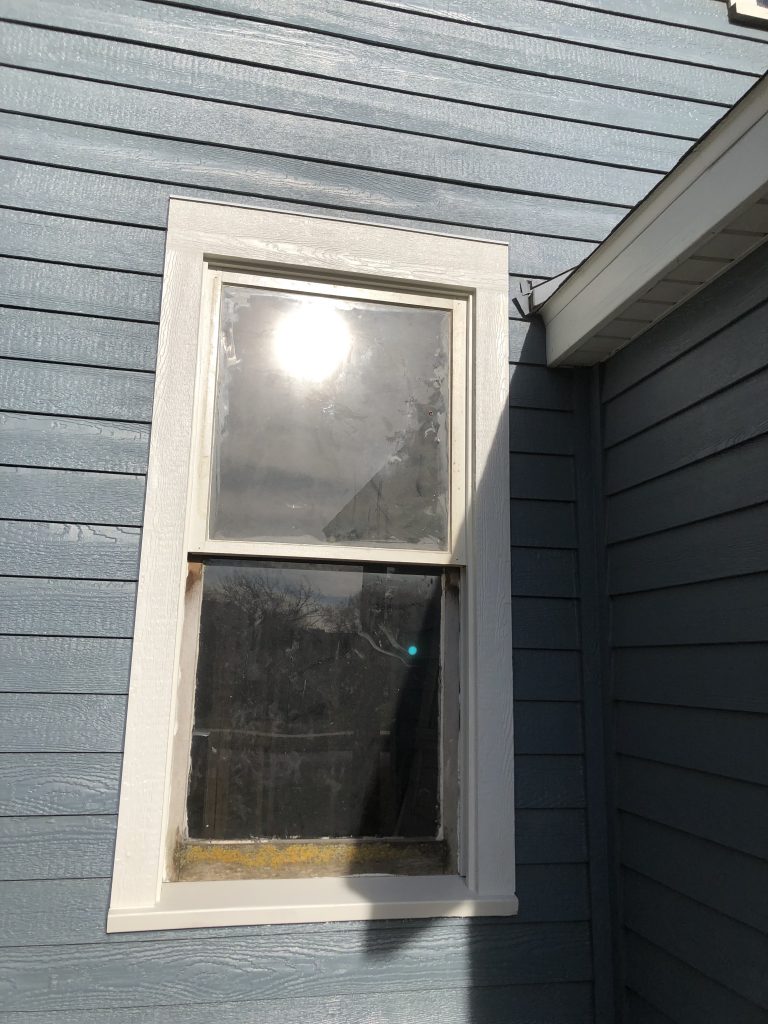
Installed powder room window with the trim around it, prior to painting.
Guest bedroom window. With trim installed, prior to painting.
Guest bedroom with painted frame, but the sashes have yet to be painted.
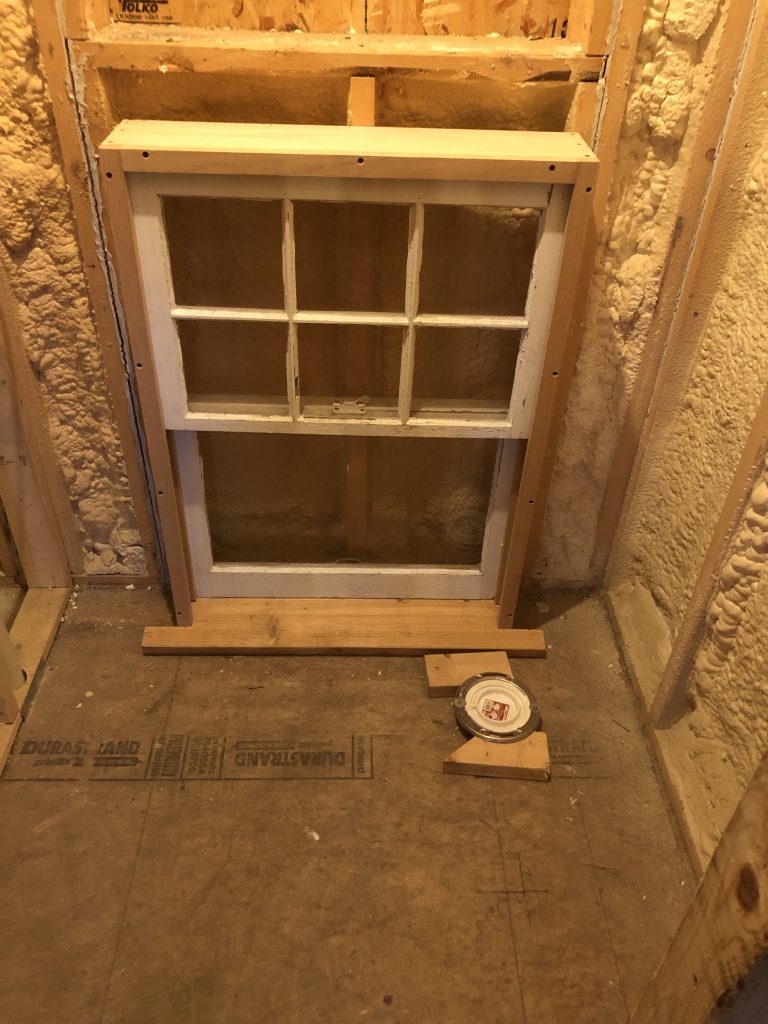
Day 8, our first day to start working on the windows. Unlike earlier posts (last year) where we restored windows that were already installed in the wall, today would be the day that we had to build frames for window sashes, prior to installing them in the wall.
The plan for today was to take on the guest bedroom window and the powder room window. The powder room window actually already had a frame with a bad window sill, but it was sized for the old-style 5-inch thick wall. But with the remodel of the back of the house, all the walls are the new code thickness (6 1/2 inch). So instead of modifying the existing frame, we decided to use the old frame as a template for the new frames we needed to build.
The old window frames that are already in the house were made of the old, higher density, wood. Most likely some flavor of pine. However, with the current, faster growth, lower density pine woods, I decided to use red oak for the frame builds.
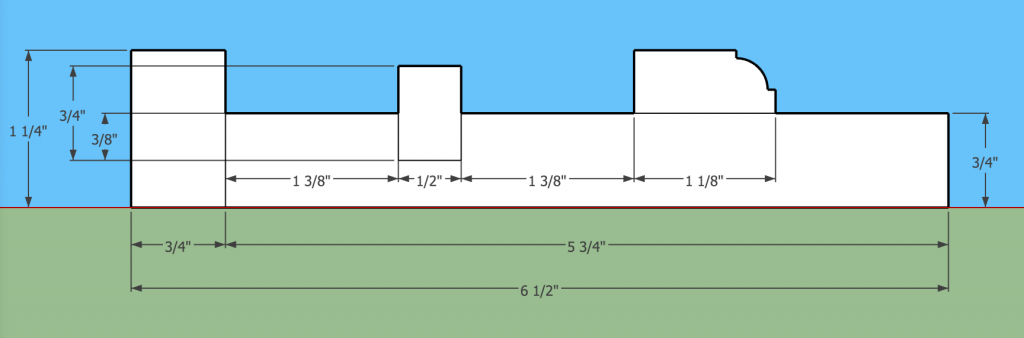
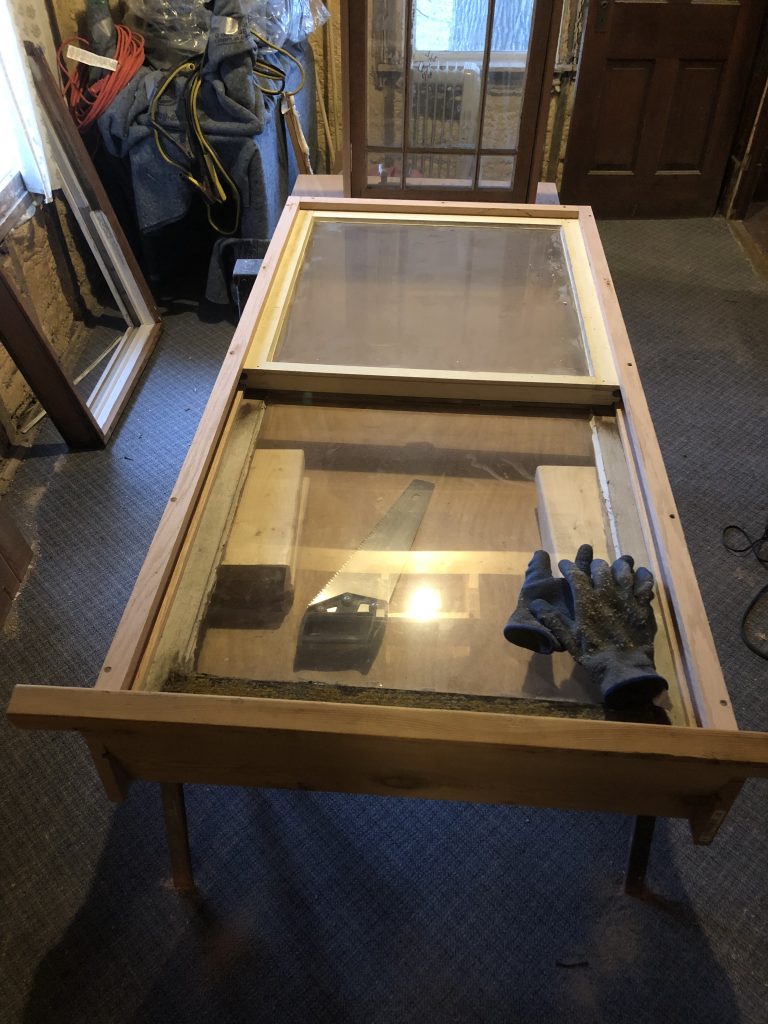
The raw base material I ordered was various lengths of 1×8 red oak. The true dimensions of a 1×8 are: 3/4″ x 7 1/4″. In the diagram below you can see that the raw stock is ripped with two cuts: One to get a main board of 5 3/4″ wide and one for the face frame of 1 1/4″ wide. A separate board is used to get the 1/2″ strips for the separator/sliding guide between the top sash and bottom sash. The fancy profile is a stock (colonial) profile that every lumber store carries as a ‘window stop’ profile.
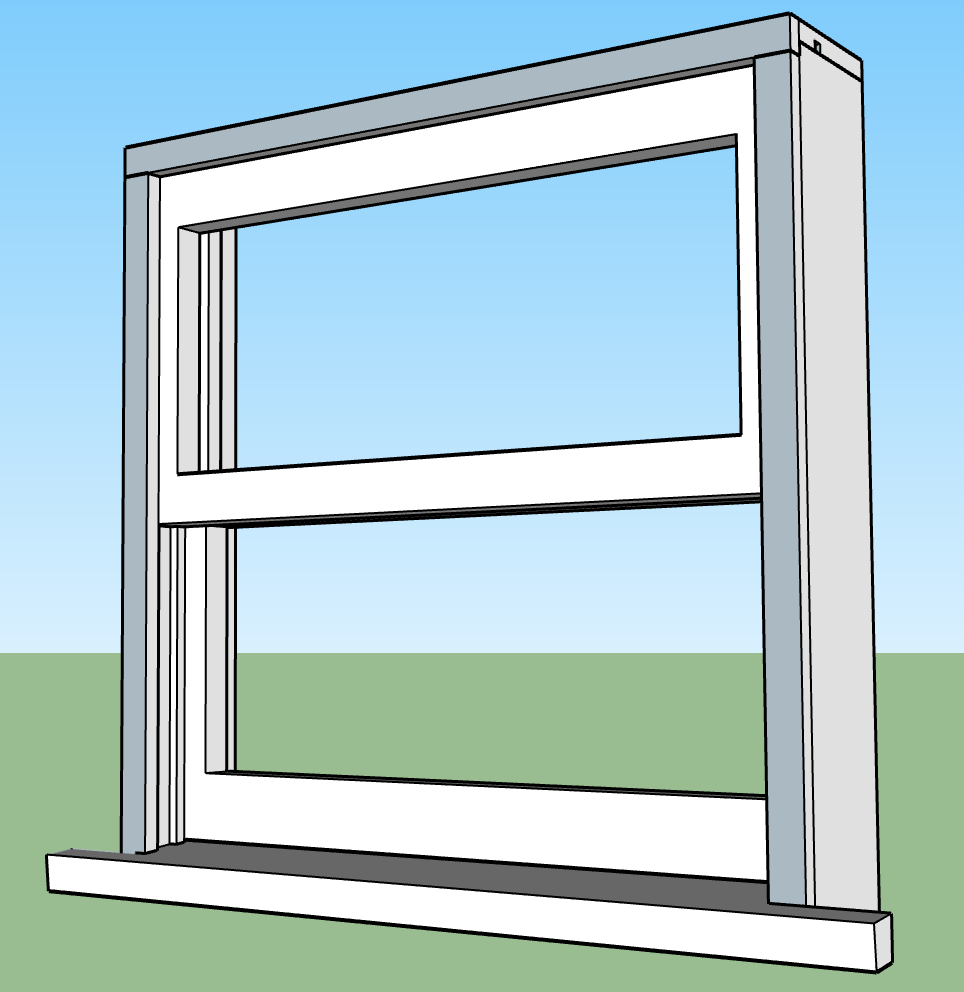
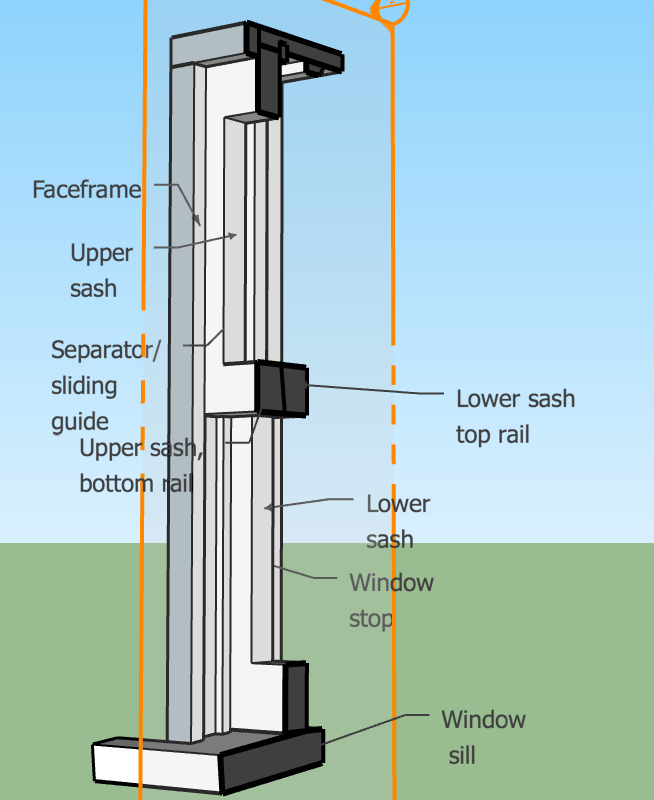
In the picture on the left you can see a cross section of the double-hung window.
What is interesting is the way the bottom rail of the top sash and the top rail of the bottom sash wedge into each other. That design, in combination with a certain type of latch that sit on top of the top rail of the bottom sash, make the sashes sit very snug when the window is closed and locked..
The resulting window frames were ready for installation, but we did not have enough courage and time to make a hole in the wall (and siding) on the north side of the house.
Powder room window with new frame and new window silGuest bedroom window.
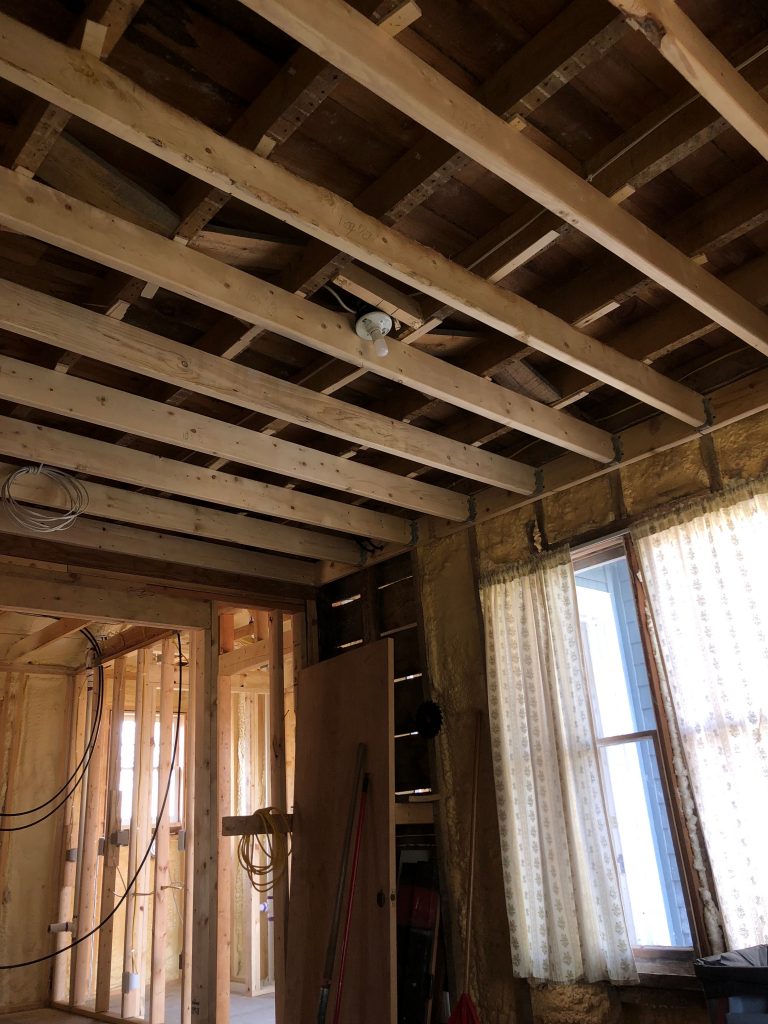
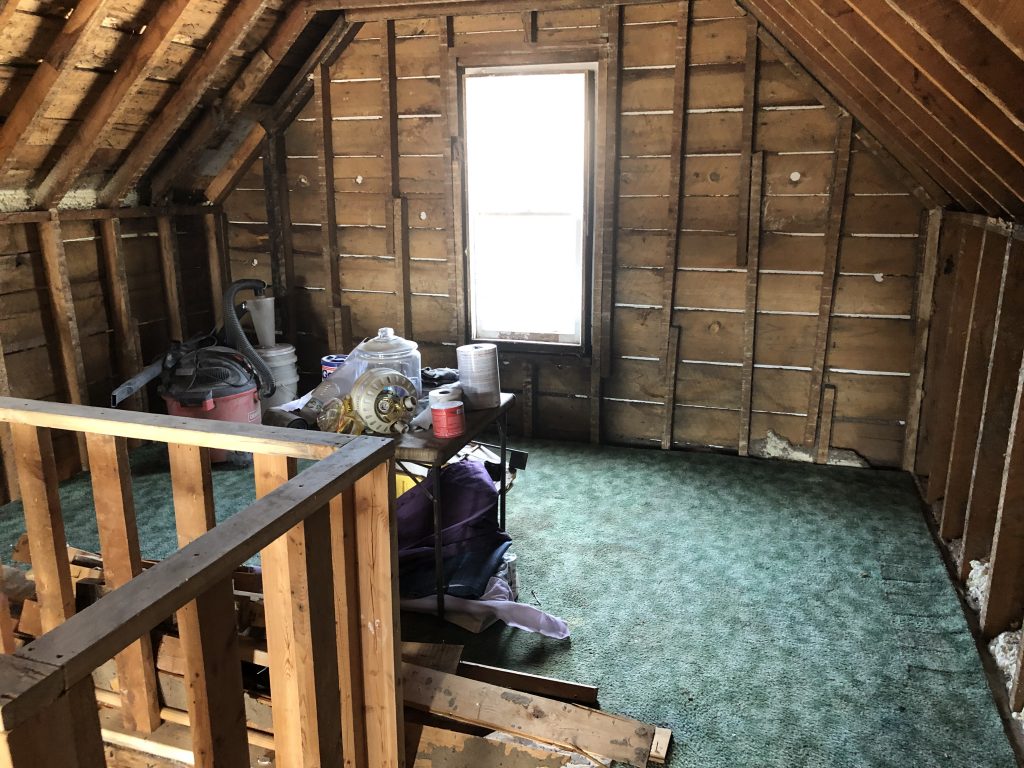
Done with the upstairs, so today, Tuesday, April 16 we started work downstairs. The floor of the small room upstairs above the dining room has been a concern, as it was very bouncy when walked upon.
The plan was to reinforce the existing floor by adding cross beams of 2×6 lumber. The interesting challenge was to deal with the different dimensions of the existing 2×6 beams. Most intersections between the old and the new beams required some amount of shimming to ensure proper support. The thickness of the shims varied from no shim needed to about 3/4 inch thick.
During this day we also did a lot of cleanup and organization. Overall however this was a short day in comparison to prior days.
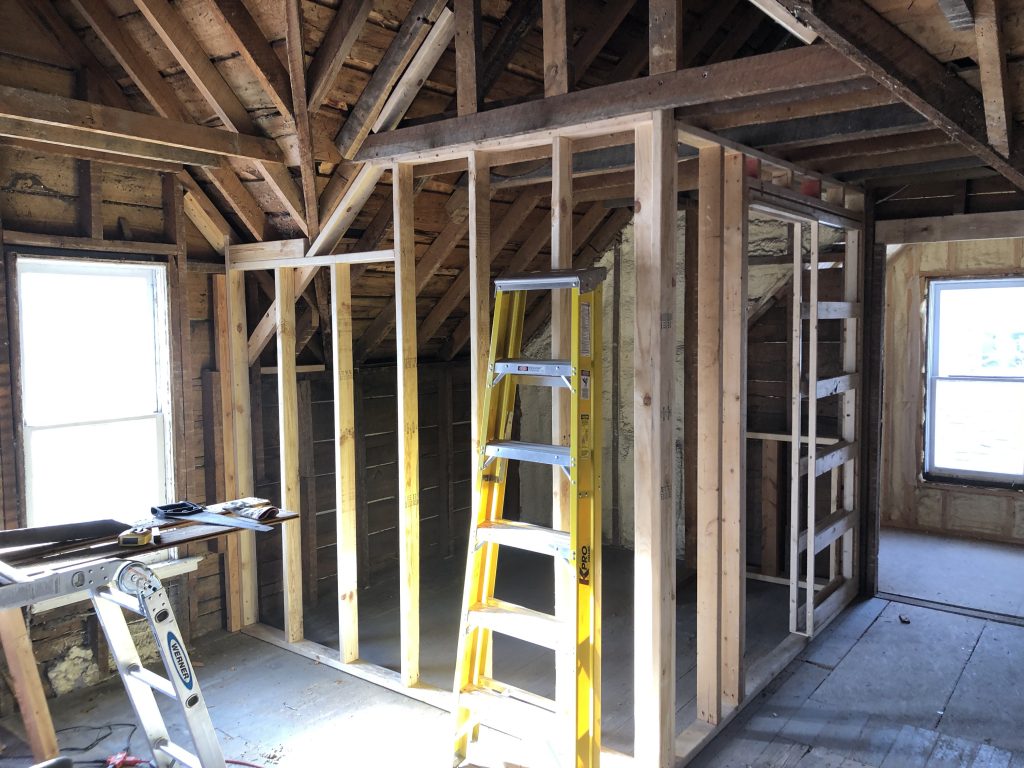
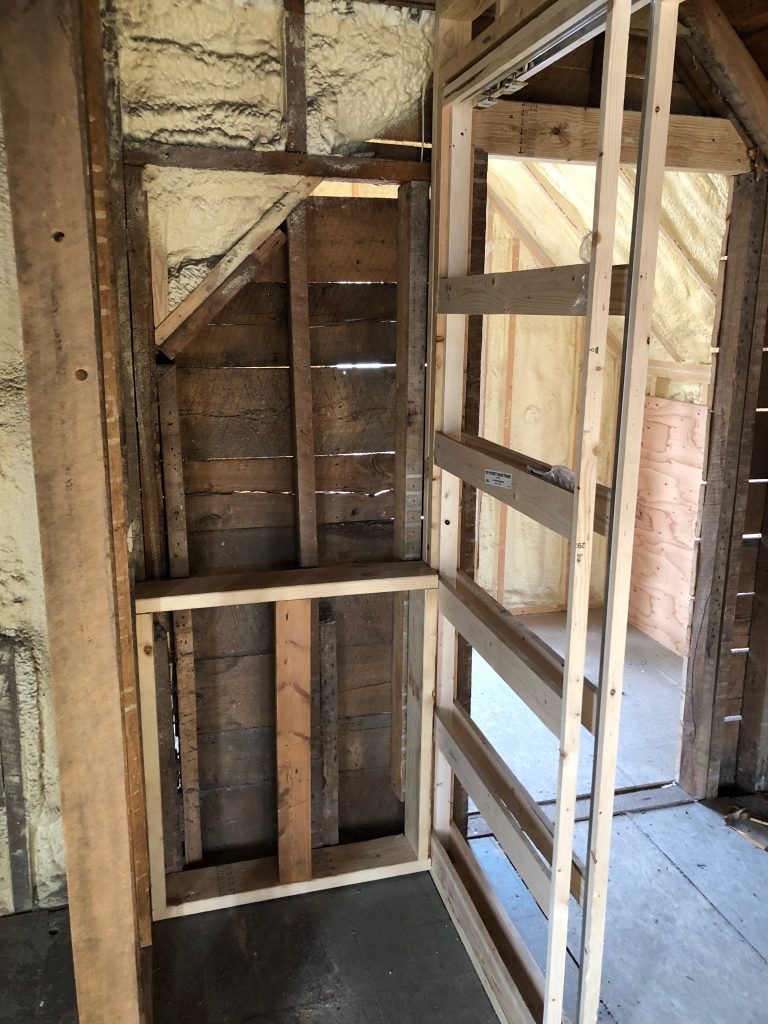
It is now Monday, April 15 and today was crunch time. We needed to have the bathroom walls framed, such that the plumber and the electrician could put their pipes and wiring in on Tuesday.
The master bathroom features two pedestal sinks, a toilet and a Shower, separated by a framed wall. The bathroom also features a pocket door.
We had already purchased the pocket door frame, so that made it a bit easier, since it had the instructions and dimension of the rough opening.
As is the case with old homes, nothing is plumb, and nothing is level. The key for this type of remodel is to adapt to this reality, without giving in and making the new walls out of plumb/level.
Another minor, but very important adaptation that was needed, was the placement of the toilet. The toilet has a large waste connection that is 12-inch on-center from the back wall. If we would have placed the toilet at that position, without adaptation, the drain would have ended up right on-top-of the laminated beam that supports the floor. A small console-type bump-out of the wall (6 inches deep) was added into the design and no there is plenty of the room for the waste lines.
Once we had framed all of the bathroom, we started working on some fixes to the structure. In no particular order, those were:
Replacing three covers plates spanning two holes in the floor in the master bed room
Covering a hole in the green room (named after the color of it’s shag carpet.)
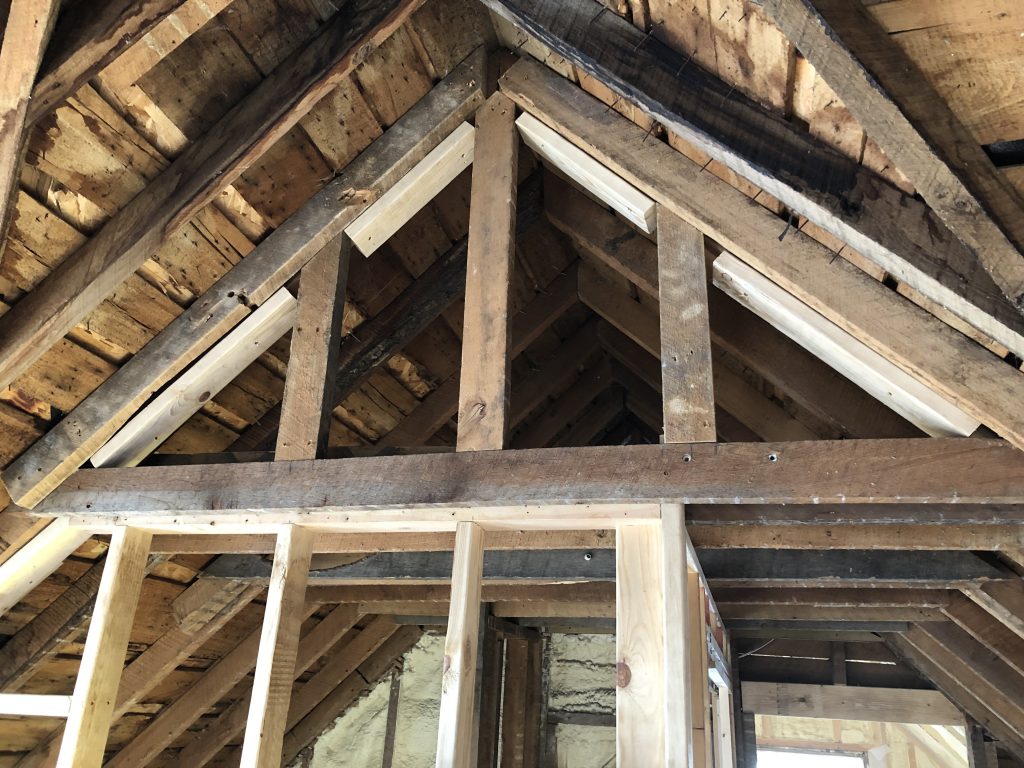
Adding support for a roof joist out of which a section was cut to allow for the chimney (two times for two different chimneys).
Adding a drywall support for the separation of the cathedral ceiling and the attic space above the bathroom.
On April 14, after Palm Sunday Mass we went straight to work on a number of construction tasks.
The first task was to modify the wall between the stairway-area and the master bedroom. That structure needed a significant change from having 2 door openings to one centered opening. We decided that using the original wood, would make things easier as the original wood has the true 2×4 inch dimensions and modern lumber 2×4 is actually 1 1/2 x 3 1/2 inch. Aside from the door opening, we also needed to add support for drywall going all the way up to the top of the cathedral ceiling.
This would normally not be such a big undertaking, were it not for the existing walls that we had to tie into. Especially the wall on the south side of the house is particularly crooked. We had to make sure that the door posts were perfectly plumb, otherwise the door will always fall open or closed. So over the short distance of the wall we were erecting, we had to overcome the crooked-ness of the existing wall into the center of the new wall.
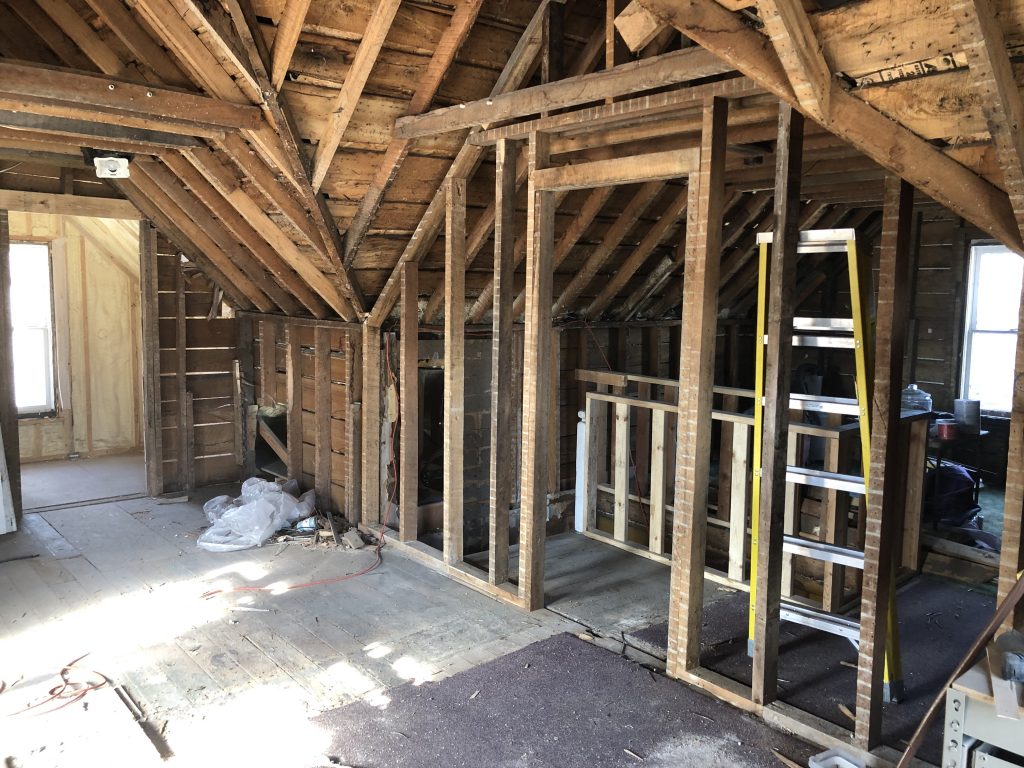
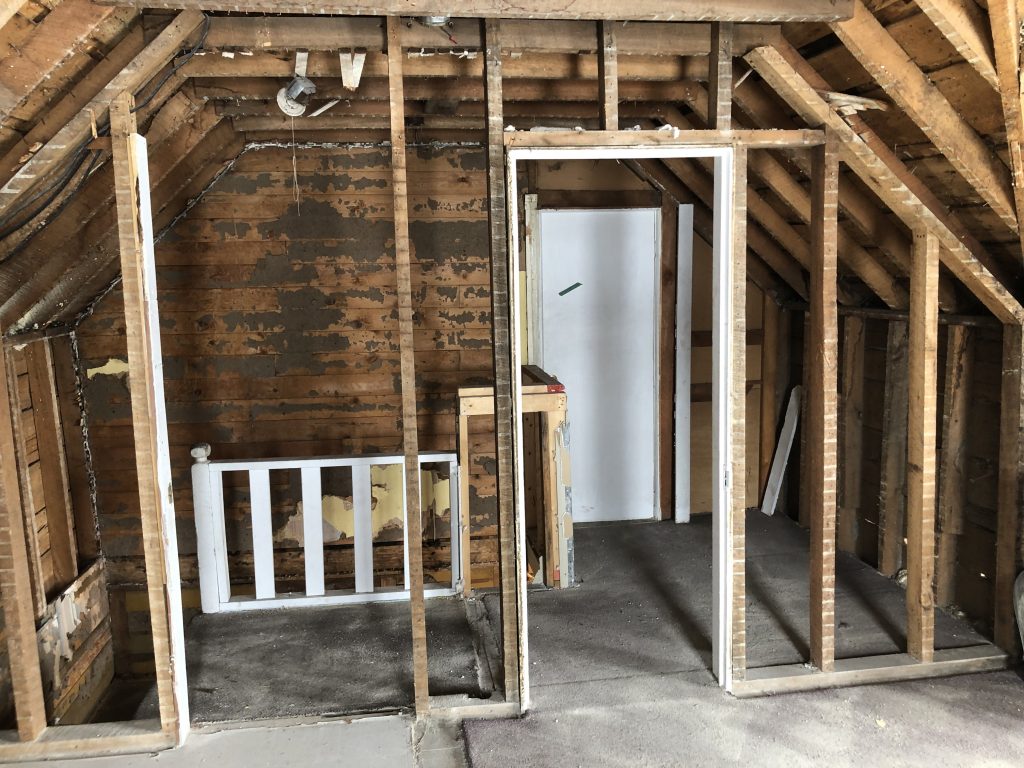
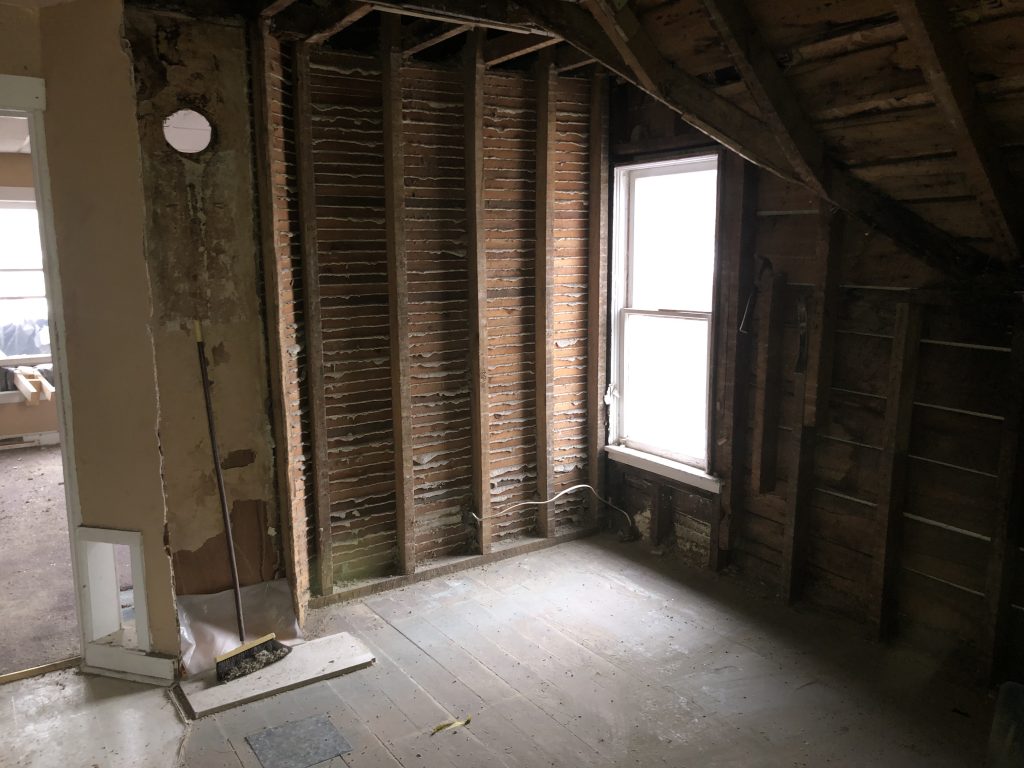
After having overcome these obstacles it was time to clear the house of obstacles in the areas where the plumber was going to have to work the next day. Here are some pictures of the upstairs after the cleanup.
In the far corner, the plumber will add connections for the kitchenette sink.This corner is a bit more involved, as this will be the corner where the master bathroom will be framed. Needless to say, a bit more organization will be needed.
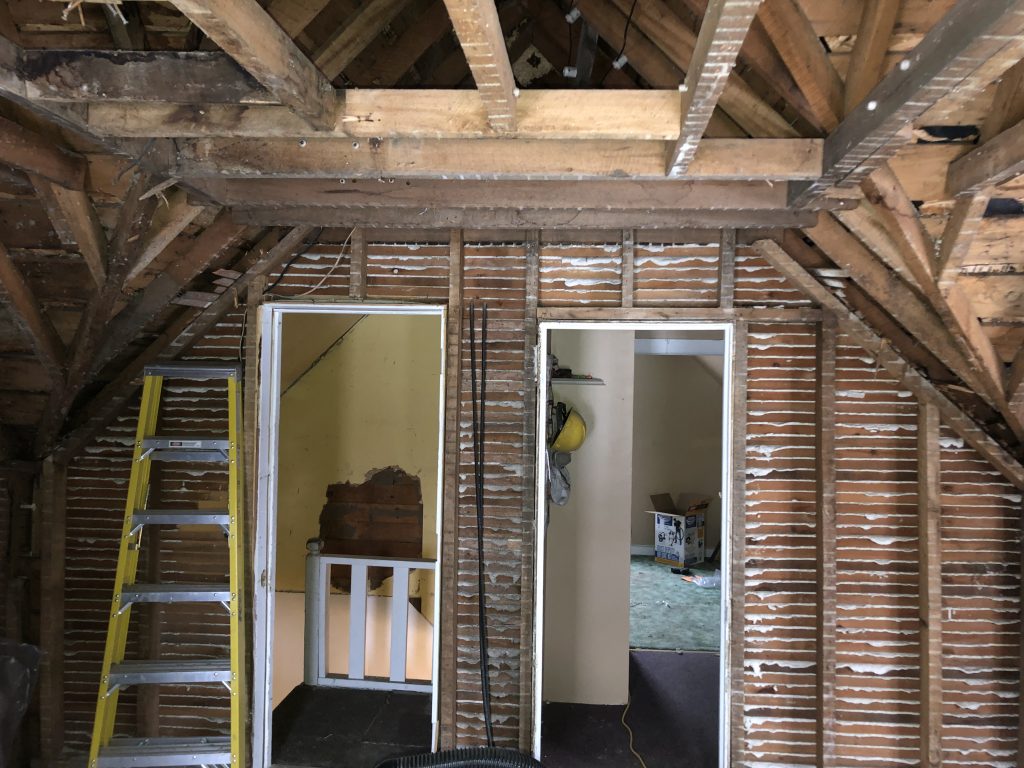
Here we are, Saturday, April 13. This day we got help from my nephew, who drove down from Fargo, ND to help us out for two days. This day’s planned and actual activities ended up a bit different. The plan was to remove the lath and plaster of the small room’s ceiling and do demo-debris cleanup, followed by construction activities.
The reality worked out a bit different. After we had removed the lath and plaster ceiling, we started looking a bit more in-depth at the wall that separated the room from the stairway area. What we found was that the wall was not constructed right. Here are some of the things that were wrong with it:
The studs were turned 90 degrees, basically reducing the width of the wall to half the normal size.
The studs were not placed at the standard 16-inch on-center spacing. It was more like 30-40 inch on-center
The wall was ‘secured’ to the ceiling joists with a total of 4 nails (the wall is over 8-feet long)
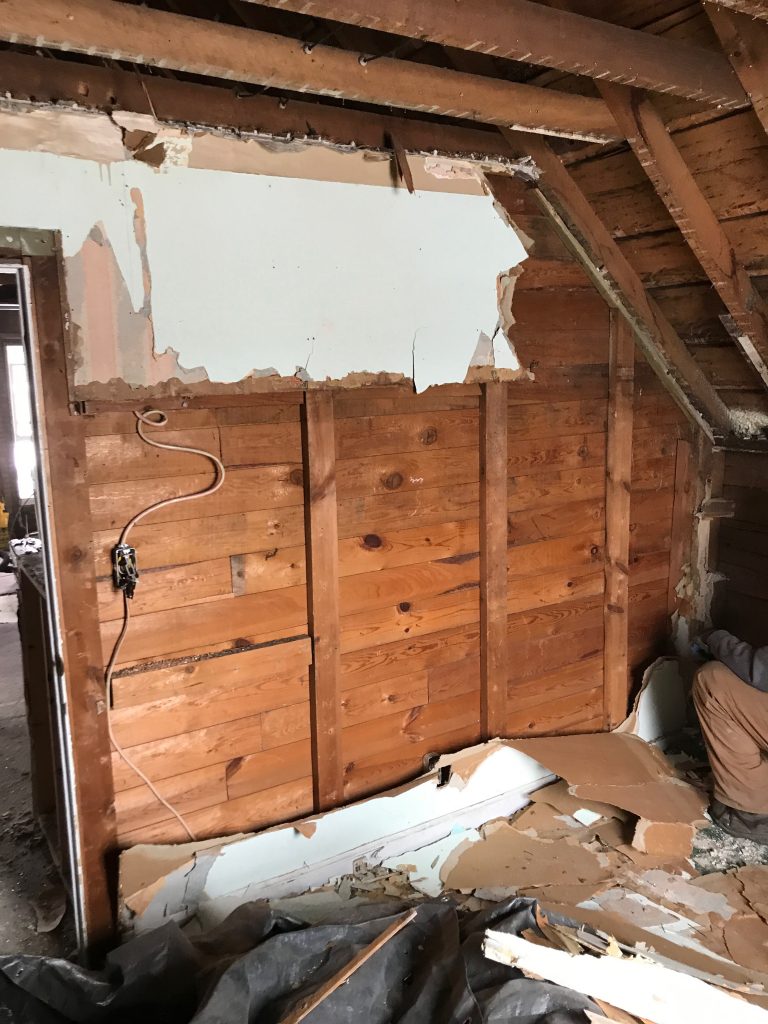
The electrical installation in the wall was done wrong. The boxes used were open-back extension boxes and the wiring was not properly routed through holes in the studs, instead they were squeezed in between the stud and the paneling.
In this picture you can see a number of the things wrong with this wall.
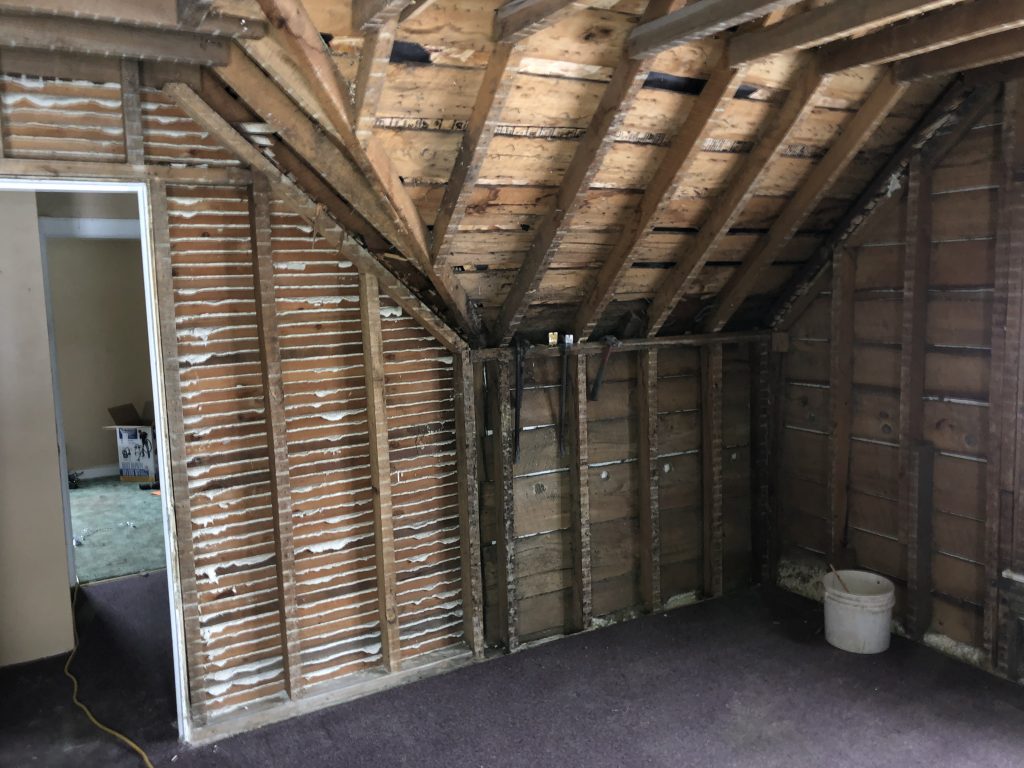
We ended up taking the wall down, which required the use of a single crowbar pull.
With the wall gone we had to decide wheter or not to build a replacement wall or to keep it open.
The decision was to keep it open, since it allowed for the flexibility to leave it open or to put wall in later.
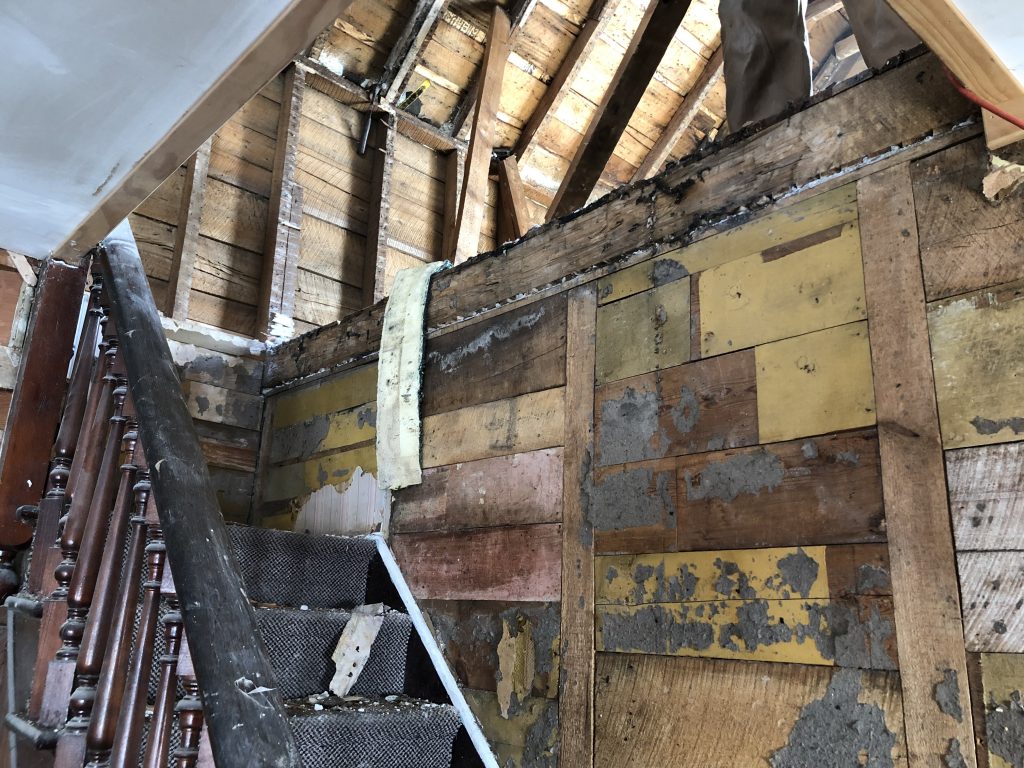
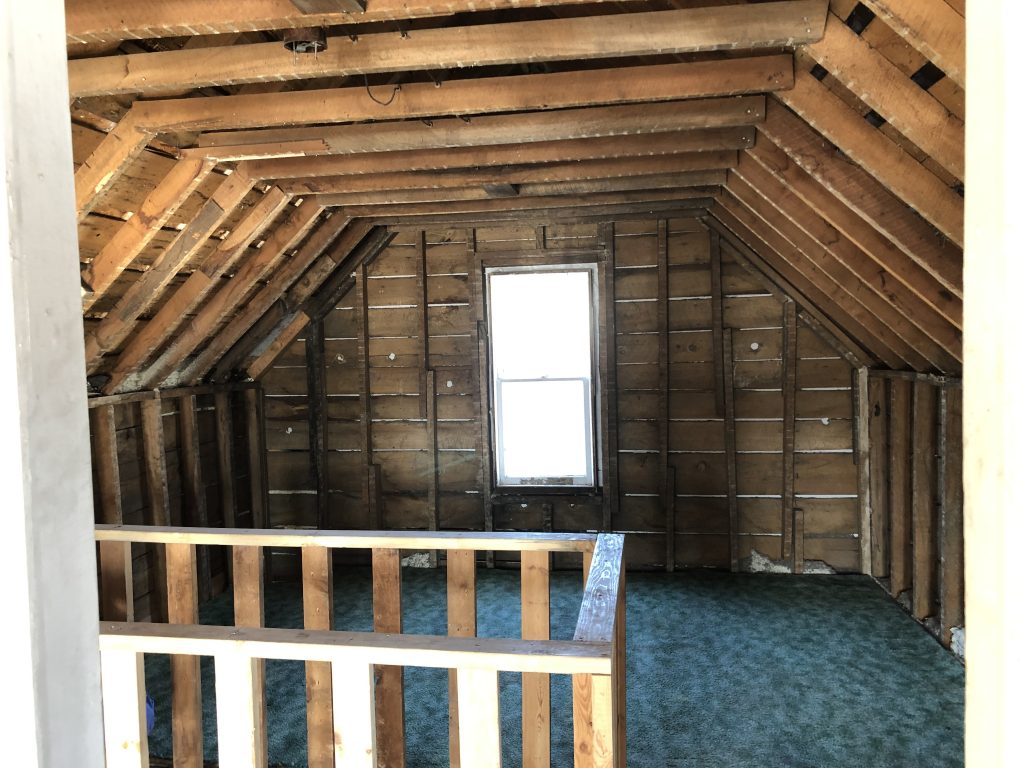
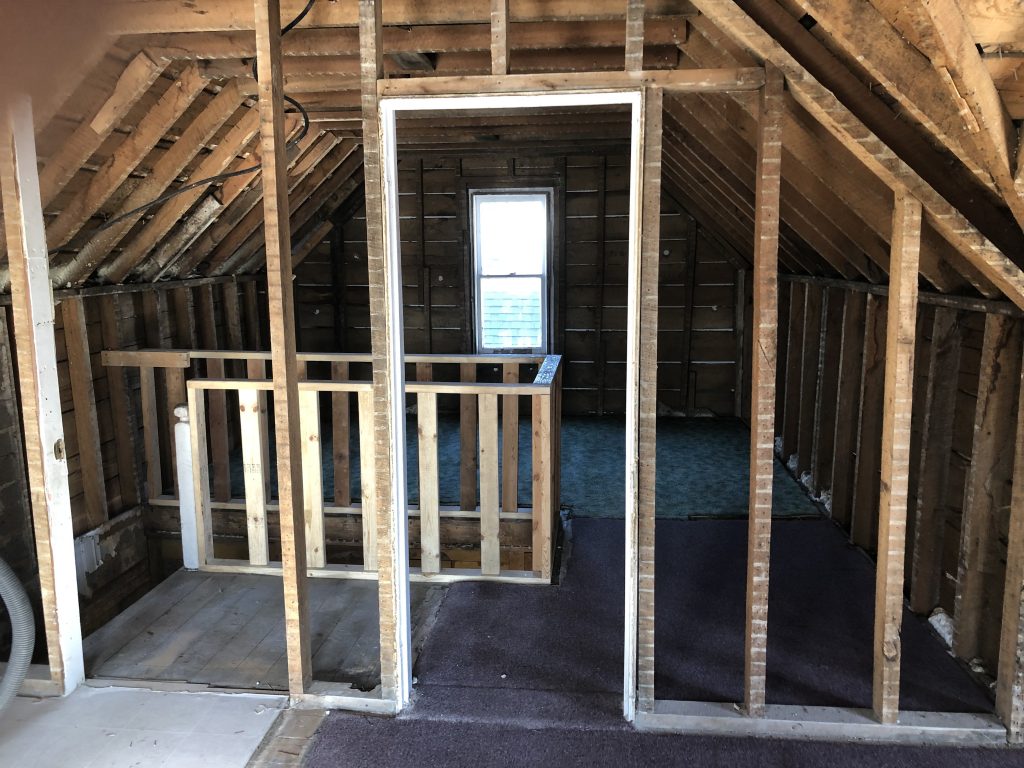
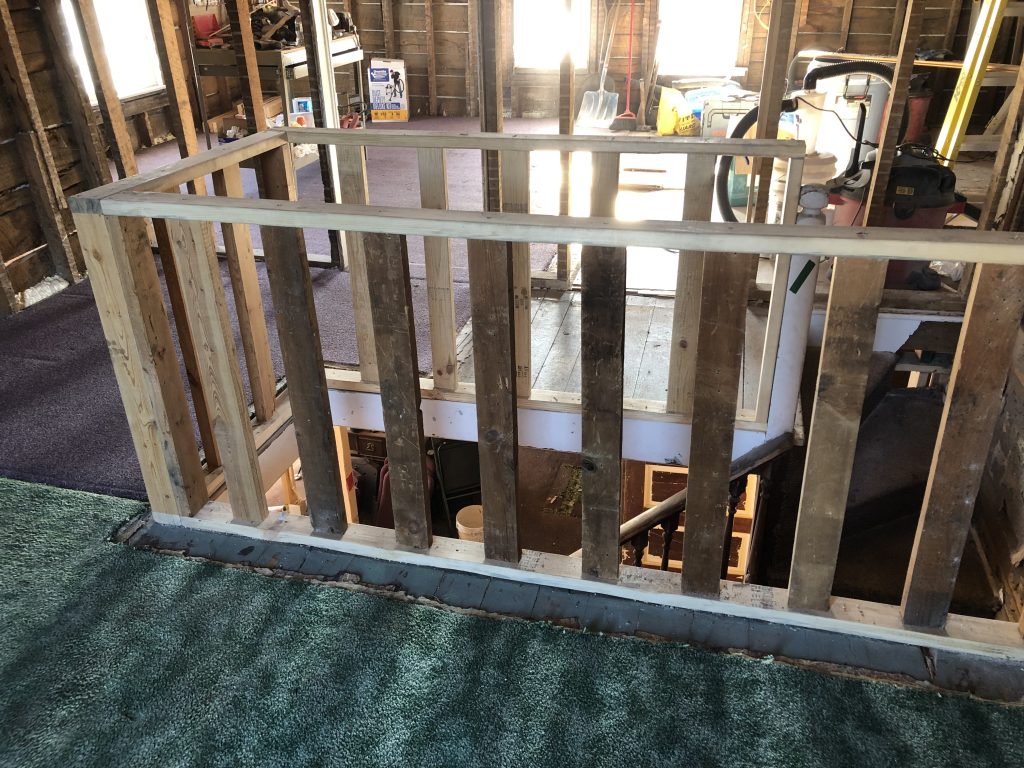
As a result of that decision, we had to build a railing around the stairs. This is what it looks like now.
A lot of lumber was salvaged during the demolition of the second floor. The lumber had a lot of nails. My friend ended up removing these nails, while I was building the railing around the stairs. This railing was made out of a combination of new and old lumber. The old lumber was used for the vertical stiles, and was reclaimed from the half-thickness wall and the ‘drywall-wall’. The new lumber was used for the top and bottom horizontal rails.
The setup in the foreground was used to remove the nails, the board that is shown on this setup is one of the tongue-and-groove shiplap boards that came from the half-thickness wall.
The final result of the day was that all the demolition work in the kenwoodstreet project was completed. From this point forward we are in construction-mode only. This is quite a milestone after more than 4 1/2 years into this project.
Today is Friday, April 12. The challenge for today was the removal of drywall-wall, as well as the ceiling and wall plaster in stairway area, while trying to keep most of the dust from falling into the first floor area. We also were able to start the removal of wall and pitched ceiling plaster in green room.
So what did we all encounter while doing this. First of all the removal of the drywall section. Because it was a small section of wall with some corners, we ran into many studs, which made for a strong wall, but also made removing the drywall extremely time consuming. After the wall was removed, we had to build a temporary railing around the stairs to keep the workplace safe. The second part was to cover the stairway opening with a tarp, such that most of the debris would end up on the tarp on the landing of the stairs, instead of down the stairs.
Before: Here you can see the drywall section that created a little hallway between the two rooms, separating them from the stairway. (this house used to be spllit into two apartments. The left door opening was the entrance of the apartment, and the right door was the connection to the bedroom of the apartment.
After removal of the drywall and the plaster in the hallway, we had to create a temporary railing. We did not replace the old railing, which was way too low. The dark wall (left from the center of the picture) is shiplap (tongue-and-groove) wood. The ‘splotches’ are the remains of some sort of cardboard based covering, which in turn was covered by wood-paneling. Neither one of these coverings were very attractive.
As you can tell from these two pictures, we also started to remove some of the studs in the wall that separates the master bedroom from the stairs. That work will be completed on Saturday. The intent is to make that wall have only one (centered) door opening.
Lastly, we started removal of the lath and plaster in the small room on the other side of the stairs. We tried to finish the removal but we both ran out of steam and decided to call it a day. The only thing left to do in that room was the removal of the ceiling and some of the lower rows of lath on the walls.
Let’s start this post with a weather update. It is Thursday April 11, 2019 and the State of Minnesota is under a severe winter weather advisory. Basically, it is blizzard time. Local schools were closed for the day, Mass at the local church was canceled. Roads were very quiet. So what do us two Californians do? We get into our car and start working in an unheated house.
The plan for the day was to gut the room we started on yesterday. The work consisted of:
Taking down the lath and plaster ceiling and walls
Removing the separating wall in the middle of the room
Remove all debris
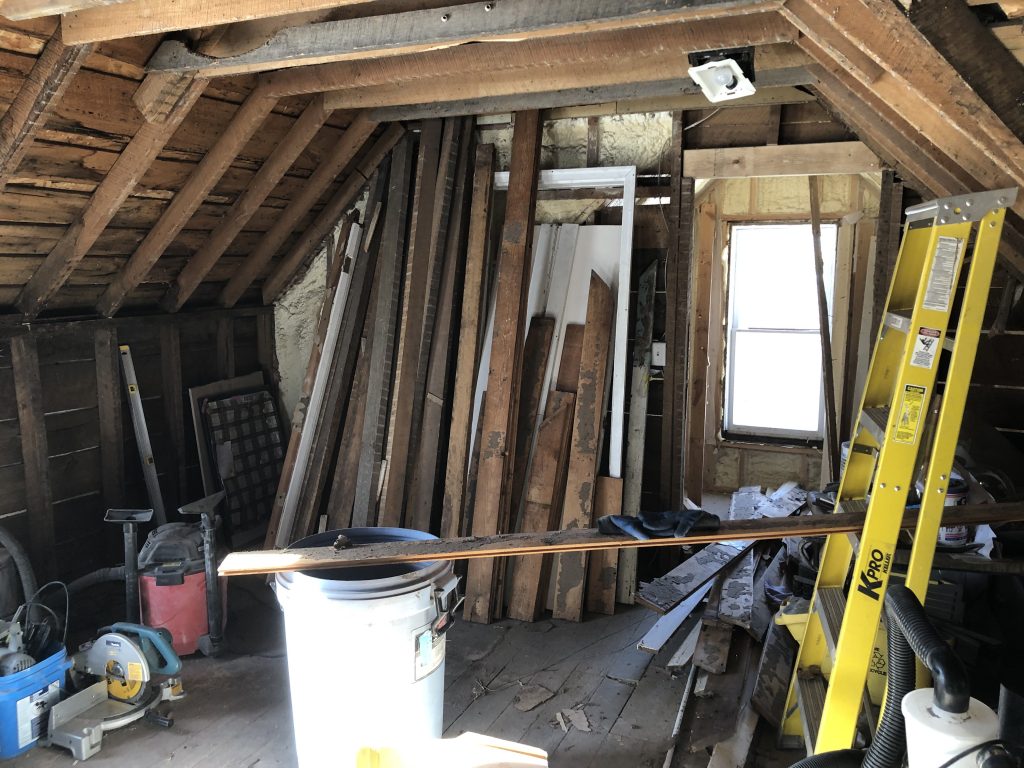
Salvage all of the oak studs and possibly the trim of the windows
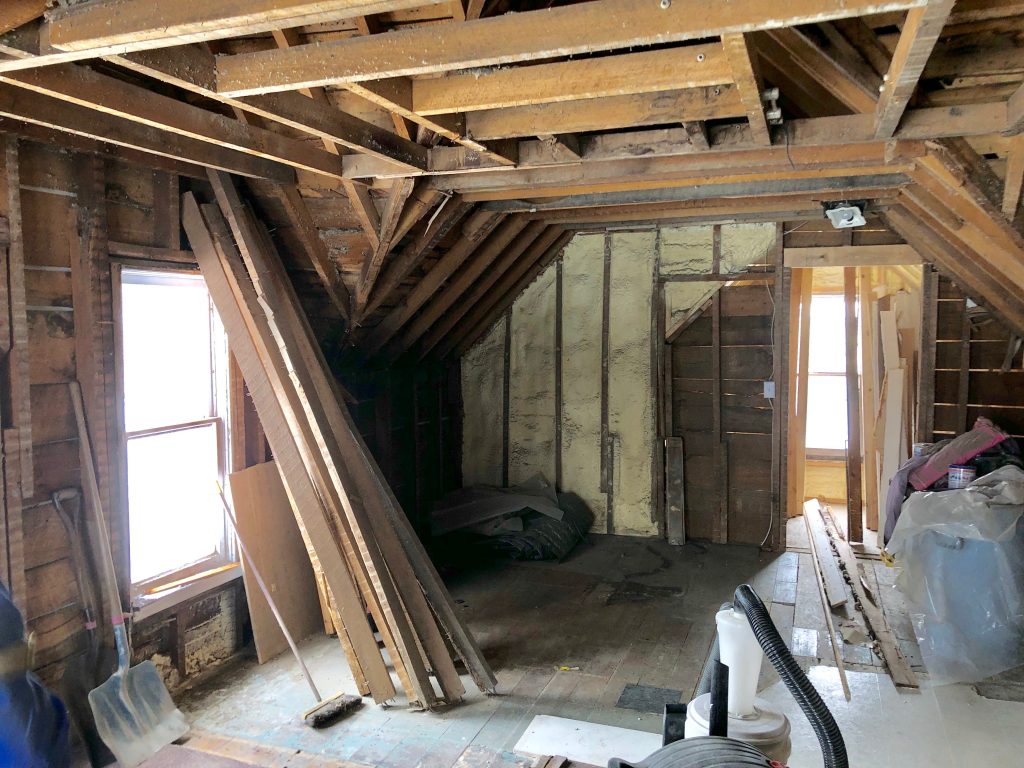
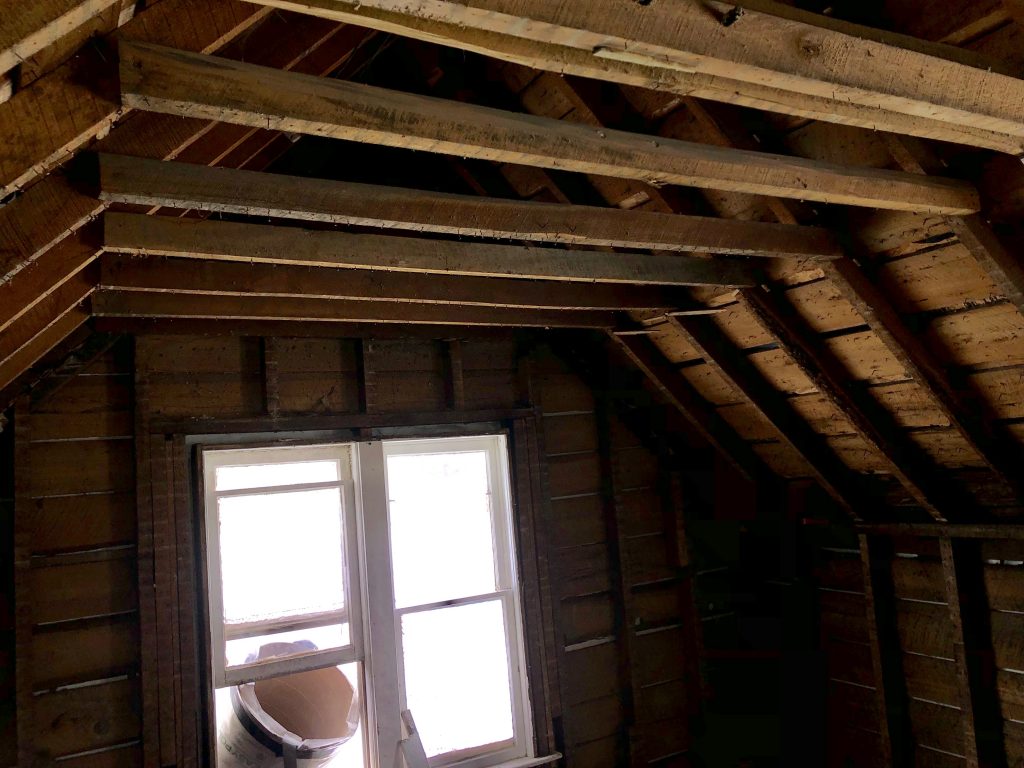
Yesterday we removed the lath and plaster from the separating wall.Now that wall is gone. Between these two door openings used to be a wall.Clean walls and ceiling.A view towards the utility room. You can also see the salvaged oak studs.This is the center of the old ceiling structure. It is out intent to remove this in favor of exposing just the cross beams and giving the room a cathedral ceiling.
We got the assistance of a local Tech College student. His task was simple, yet crucial to what we got accomplished. Remove all of the debris we generated and send it down the chute (small stuff) or use a large trashcan to bring it down the stairs (all the lath). He also had the chute-maintenance duty, which consists of removing clogs and spreading out the debris in the dumpster as evenly as possible. (Did I mention that we had blizzard conditions). He worked his tail off for a full 8-hour work day. What an awesome guy.
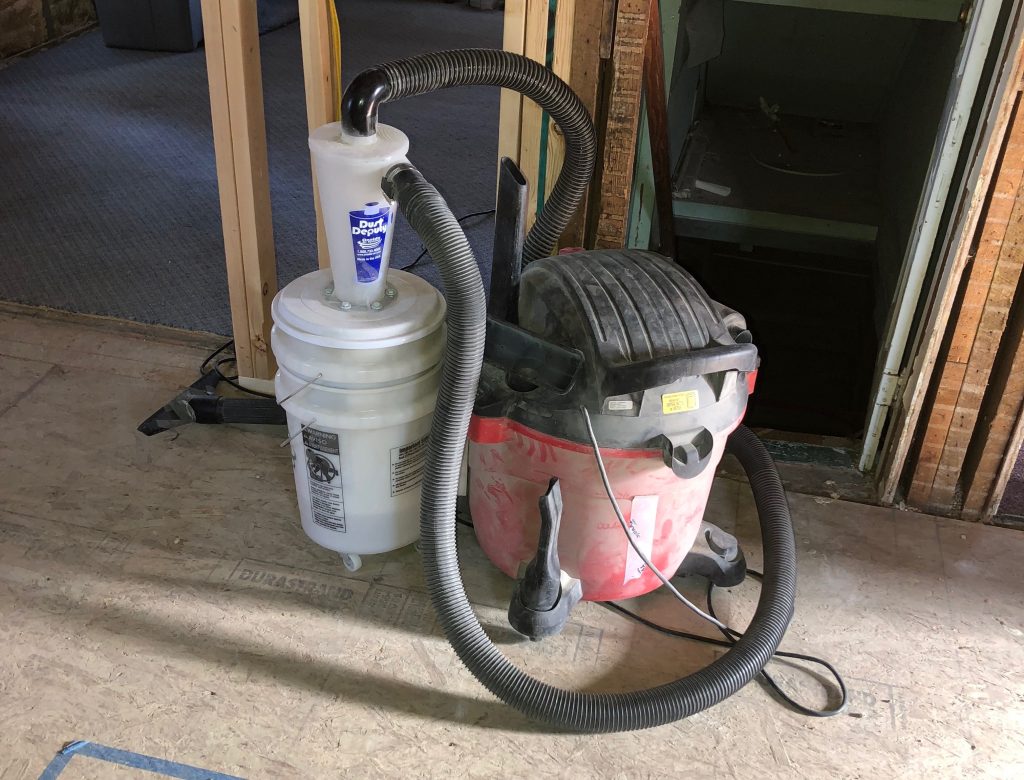
At 5 PM the student had to leave and we ended up doing some final cleaning of the space. Yesterday I had picked up an Oneida Dust collector. This is an accessory to a shop vac (any brand). It sits basically in-between the vacuum and the nozzle. It requires a bit more assembly than I expected and it does make the vacuum a bit of a contraption. I will post a picture later of what ours looks like.
This dust collector system uses some sort of ‘cyclon’ method to make the dust particles fall into the bucket that is part of the Oneida system, instead of entering into the vacuum. It claims to catch 95% of the dust and debris. Even though I did not measure this claim from a scientific perspective, I have to tell you, this thing works. Normally when I clean after a lath and plaster removal, I try to sweep as much of the dust and then use the vacuum. Even then, I still have to clear the vacuum filter many times. In this case, using this Oneida system, I did not sweep nearly as much and I had to clear the filter once (not even sure if it was all that necessary). The dust collector includes a 5 gallon bucket which I filled 4 times with dust and debris. This site is not sponsored, but I highly endorse the unit from how it works.
This ended up being another long day, almost 11 hours of hard work, fun and crazy weather (I never knew that it was possible to have lightning and thunder while the snow is falling).
Tomorrow’s plan includes the removal of a wall and gutting the ceiling of the staircase area. And if all goes smoothly, complete the gutting work by removing the lath and plaster of the last room upstairs.
Restoring a 1890 Shingle-style home to its former glory