One of the goals of our remodel and rehab efforts is to ensure that the exterior of the house stays true to the Shingle building style of the late 1800’s. Since the Shingle style was started on the east coast and later migrated inland to the midwest, we want to know what the local Shingle style homes would have looked like. Anne had already contacted the local historical society to see if they by chance had old pictures of our home. This ended up not being the case, but they do have a large collection of pictures of local homes.
Anne had therefore put in a research request and the day before my trip to MN, we received an email with a variety of homes listed that were built around the time of our vacation home.
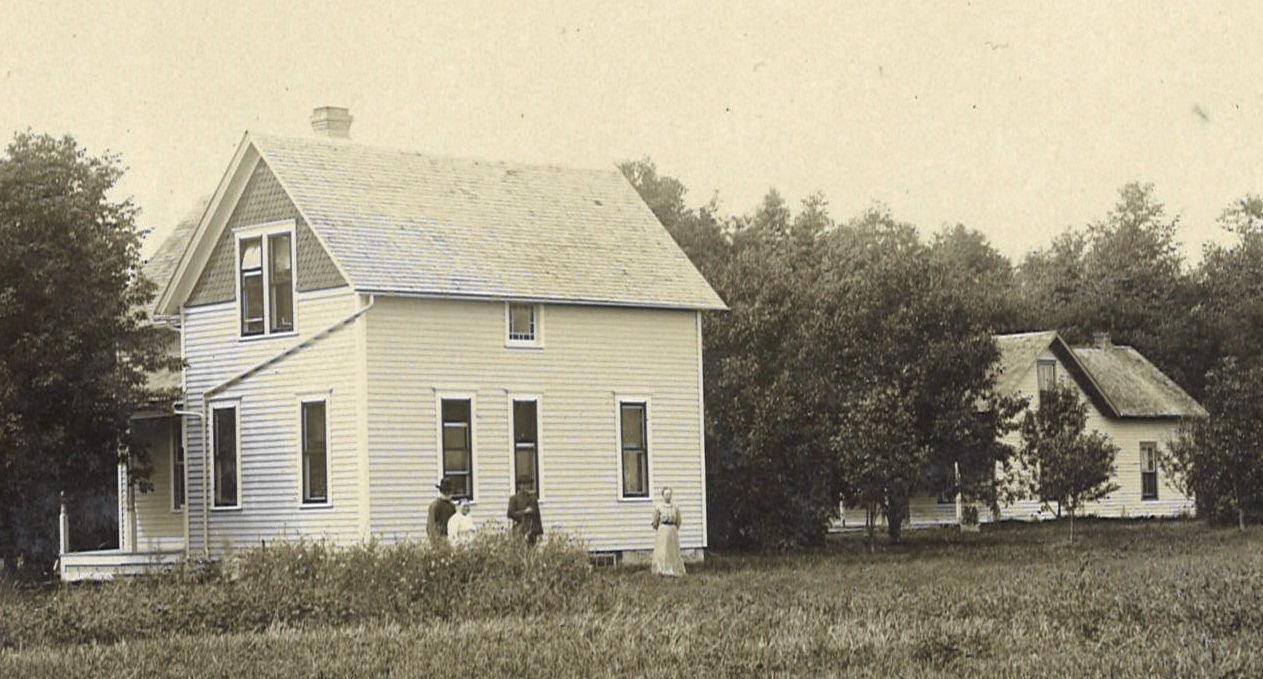
Look at the left backside. That is the type of multiple pitch I designed for our kitchen roof.
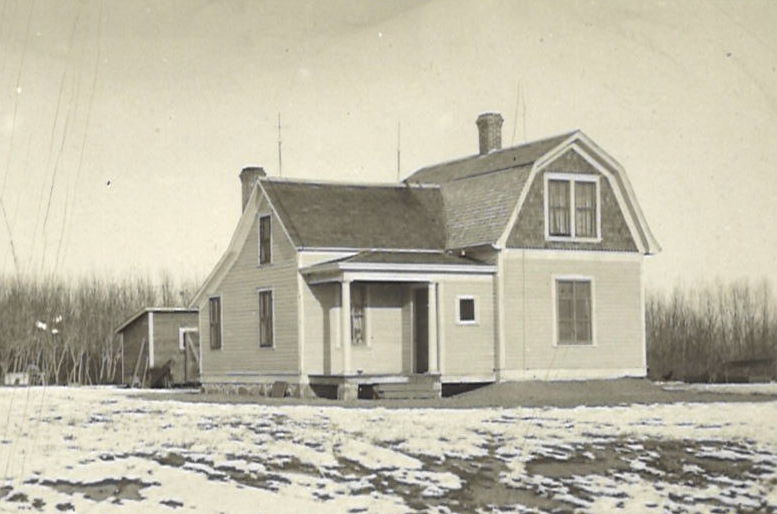
I decided that a visit to the office to pay the research fee and just to chat would be a good use of my time. And it was, found two pictures that reflected the Shingle style extremely well.
This picture gives us a good idea on what our home would have looked like, wood plan siding and shingles in the gable.
Back in town again and today was our first official work-party, hosted by Edwin. Anne is back in California, she will come to Minnesota later this month to host the second work party.
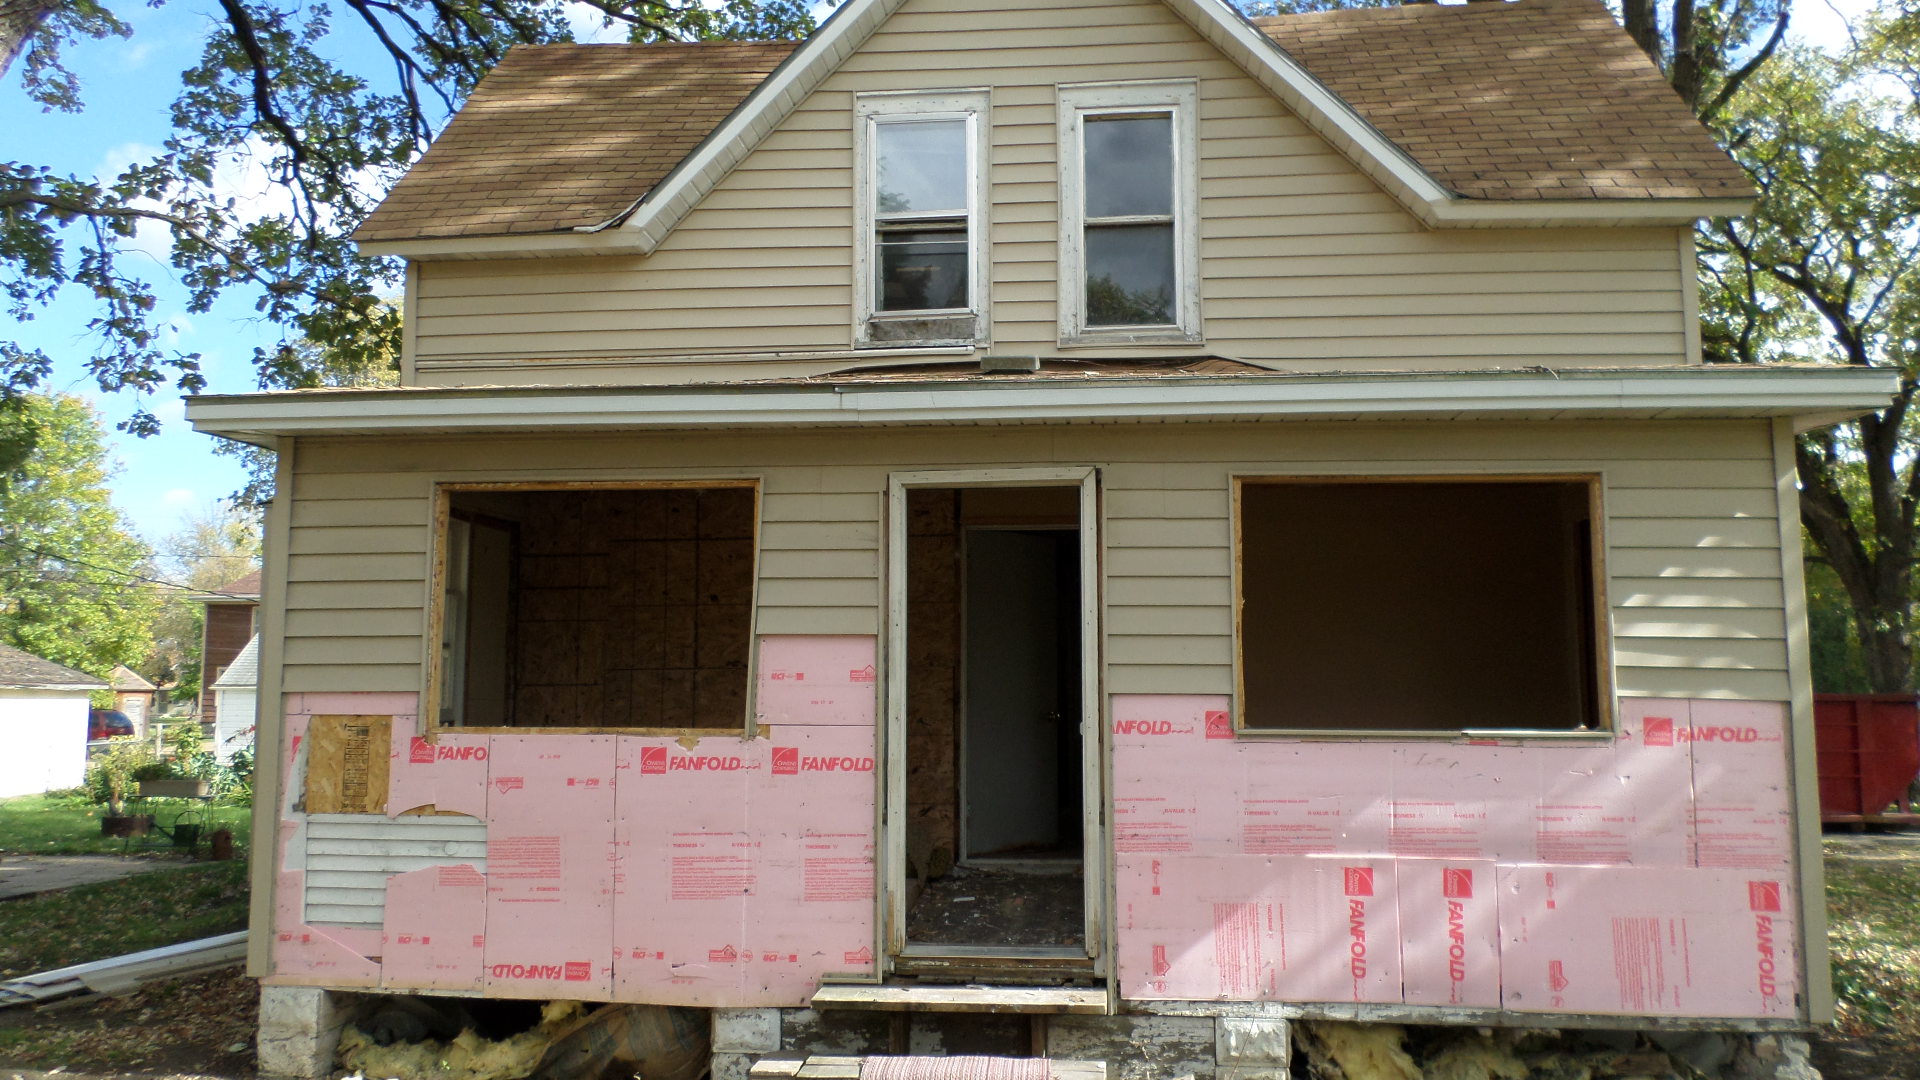
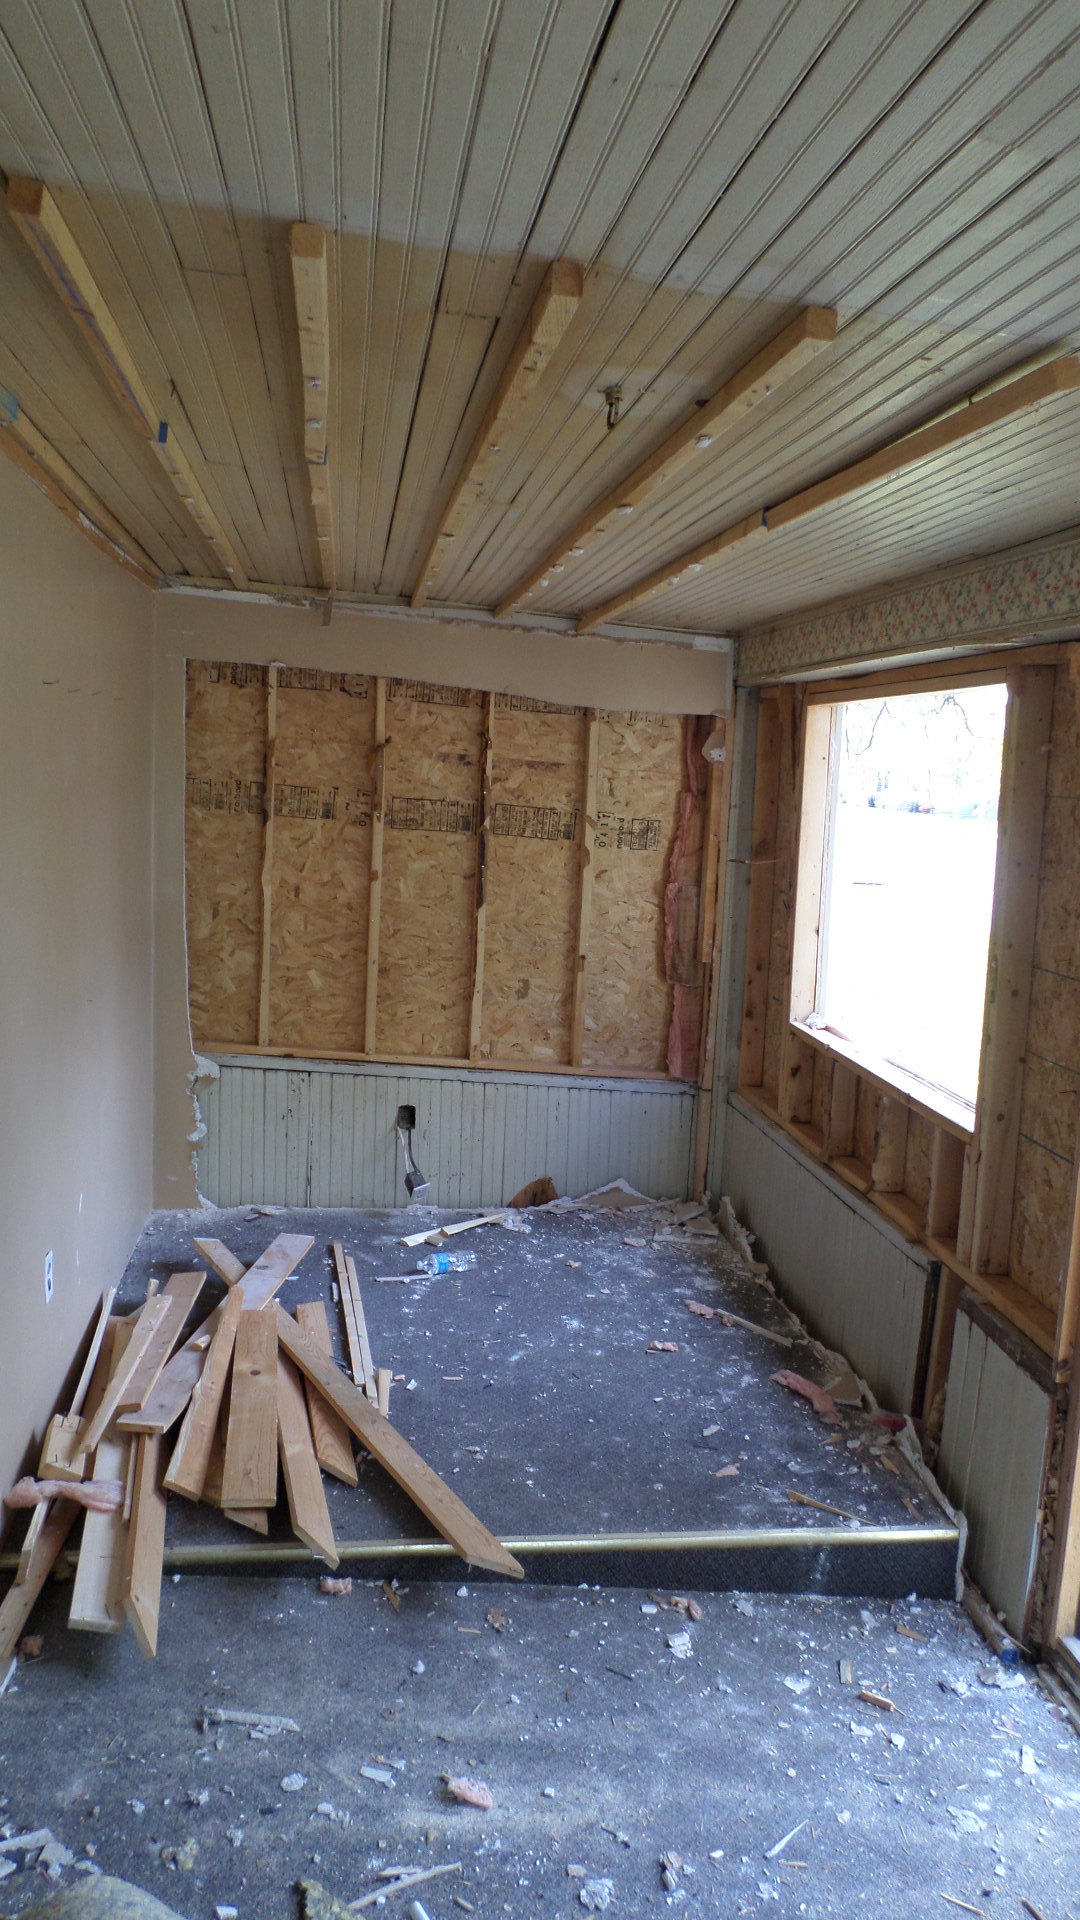
Today’s goal was to work with a group of the Tech Students to re-instate the original exterior wall on the west side of the house. This wall had been removed to make the front porch part of the main house and extend the guest bedroom downstairs. This is the first step to get the new design in place for our vacation home.
The current setup has this old converted 3 season porch be part of the main building by opening up the exterior wall on the left side.The new front entrance and the reinstated original wall on the left side.
The plan for today was to start at 9am, but it is Sunday and our Lord deserves our time on His day, so Church first, so we moved the start time for our work party to 11am.
Having a later start time, limited what we could get done, but progress was made. The home was build in 1890 and therefore, all the lumber dimensions are different from today’s dimensions. The 2×4 studs are true 2″ by 4″ and not today’s dimensions of 1 1/2″ by 3 1/2″. So the plan to rebuild the wall meant that we had to use lumber from elsewhere in the house, such that we would be able to properly reconnect the studs.
The three tech students encountered what old-growth lumber is. It is HARD. We used decking screws to frame this wall, since the spaces were too narrow to hammer nails. Many of the screws simply snapped while driving them into the wood. We ended up having to pre-drill the holes and then put the screws in.
It took a solid 5 hours to get the studs of the wall up (mind you, we only needed to place 6 studs and frame a window opening).
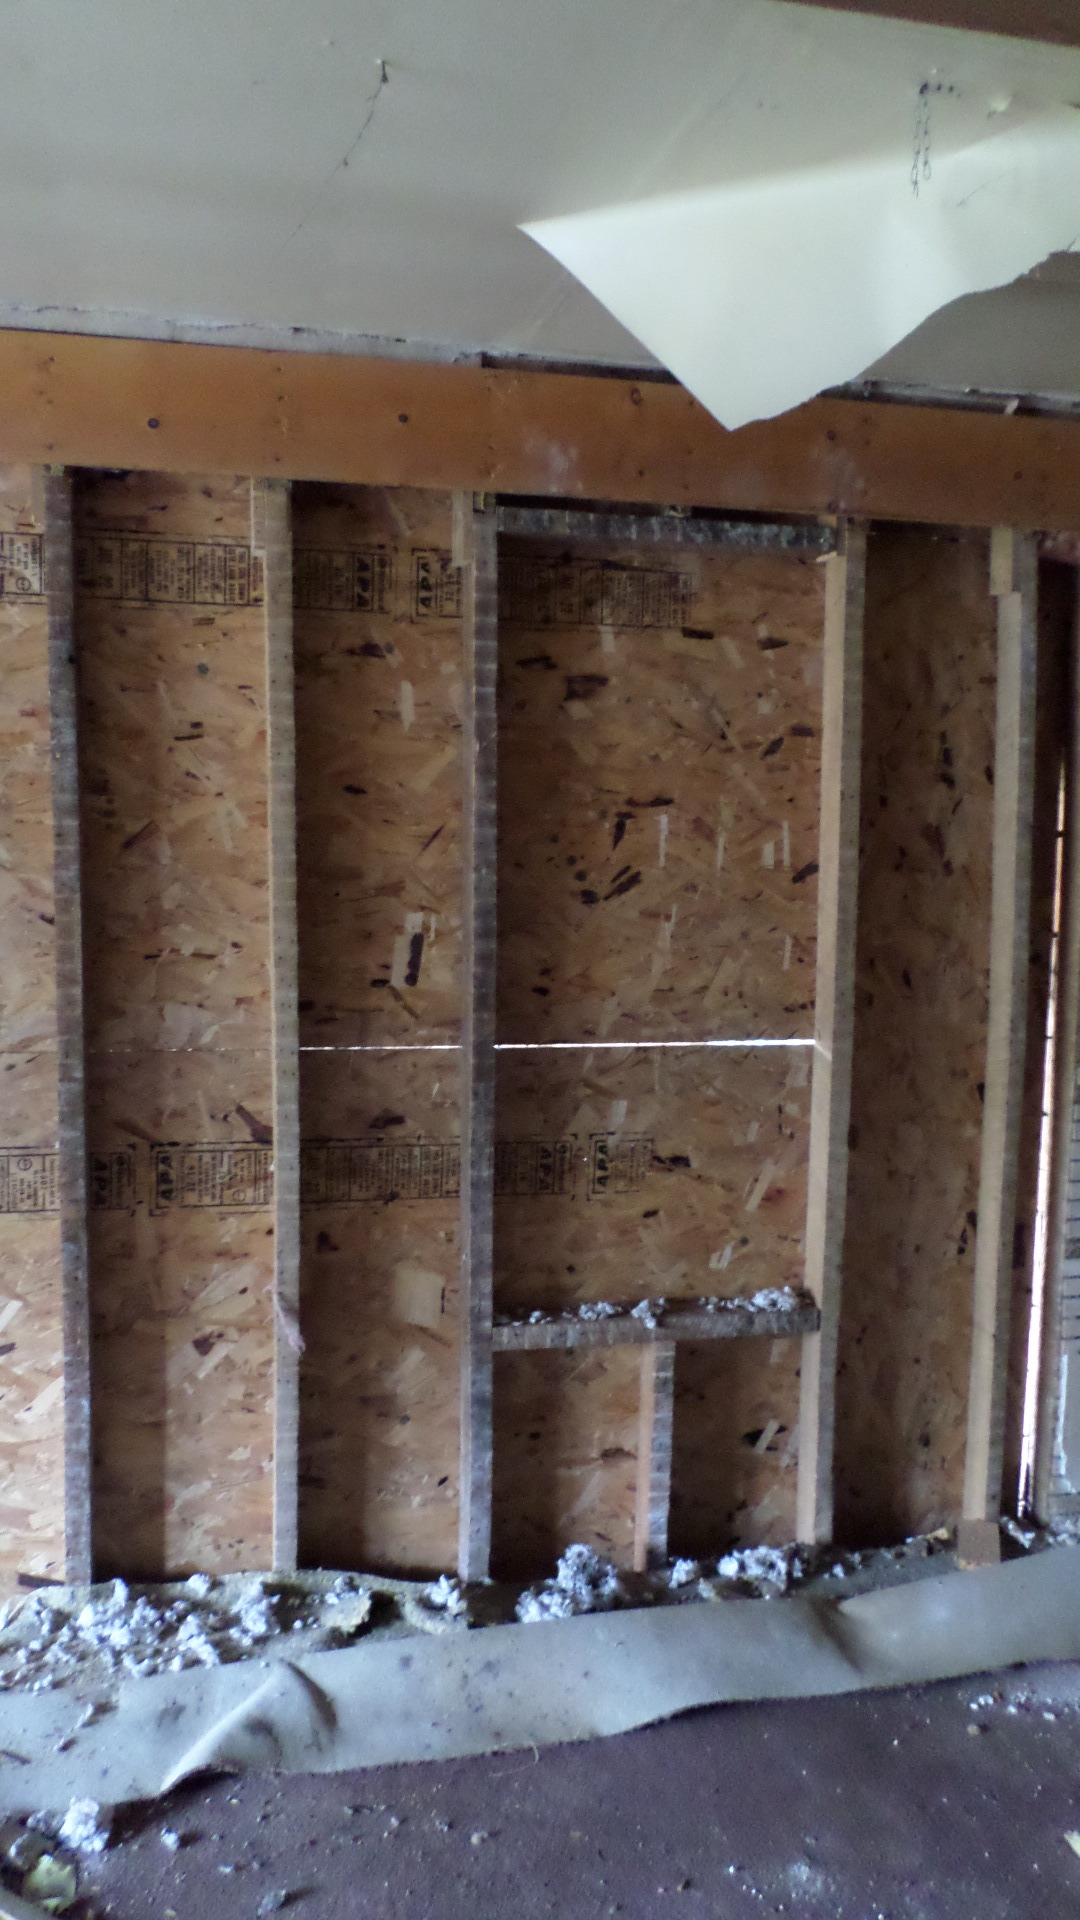
Reconstructed wall where the opening to te converted porch used to be.
While this was going on, Dave and Cher, our local family friends came to the party to work and they were such troopers. They removed all the nails from the exterior facing walls, so that we can have the insulation folks come and spray-foam these walls. I think they were there for at least 3 hours and got all the nails removed.
Priscilla, another family friend came over just to drop off some delicious home-made oatmeal-raisin cookies and ‘rolls’. Oh yum!
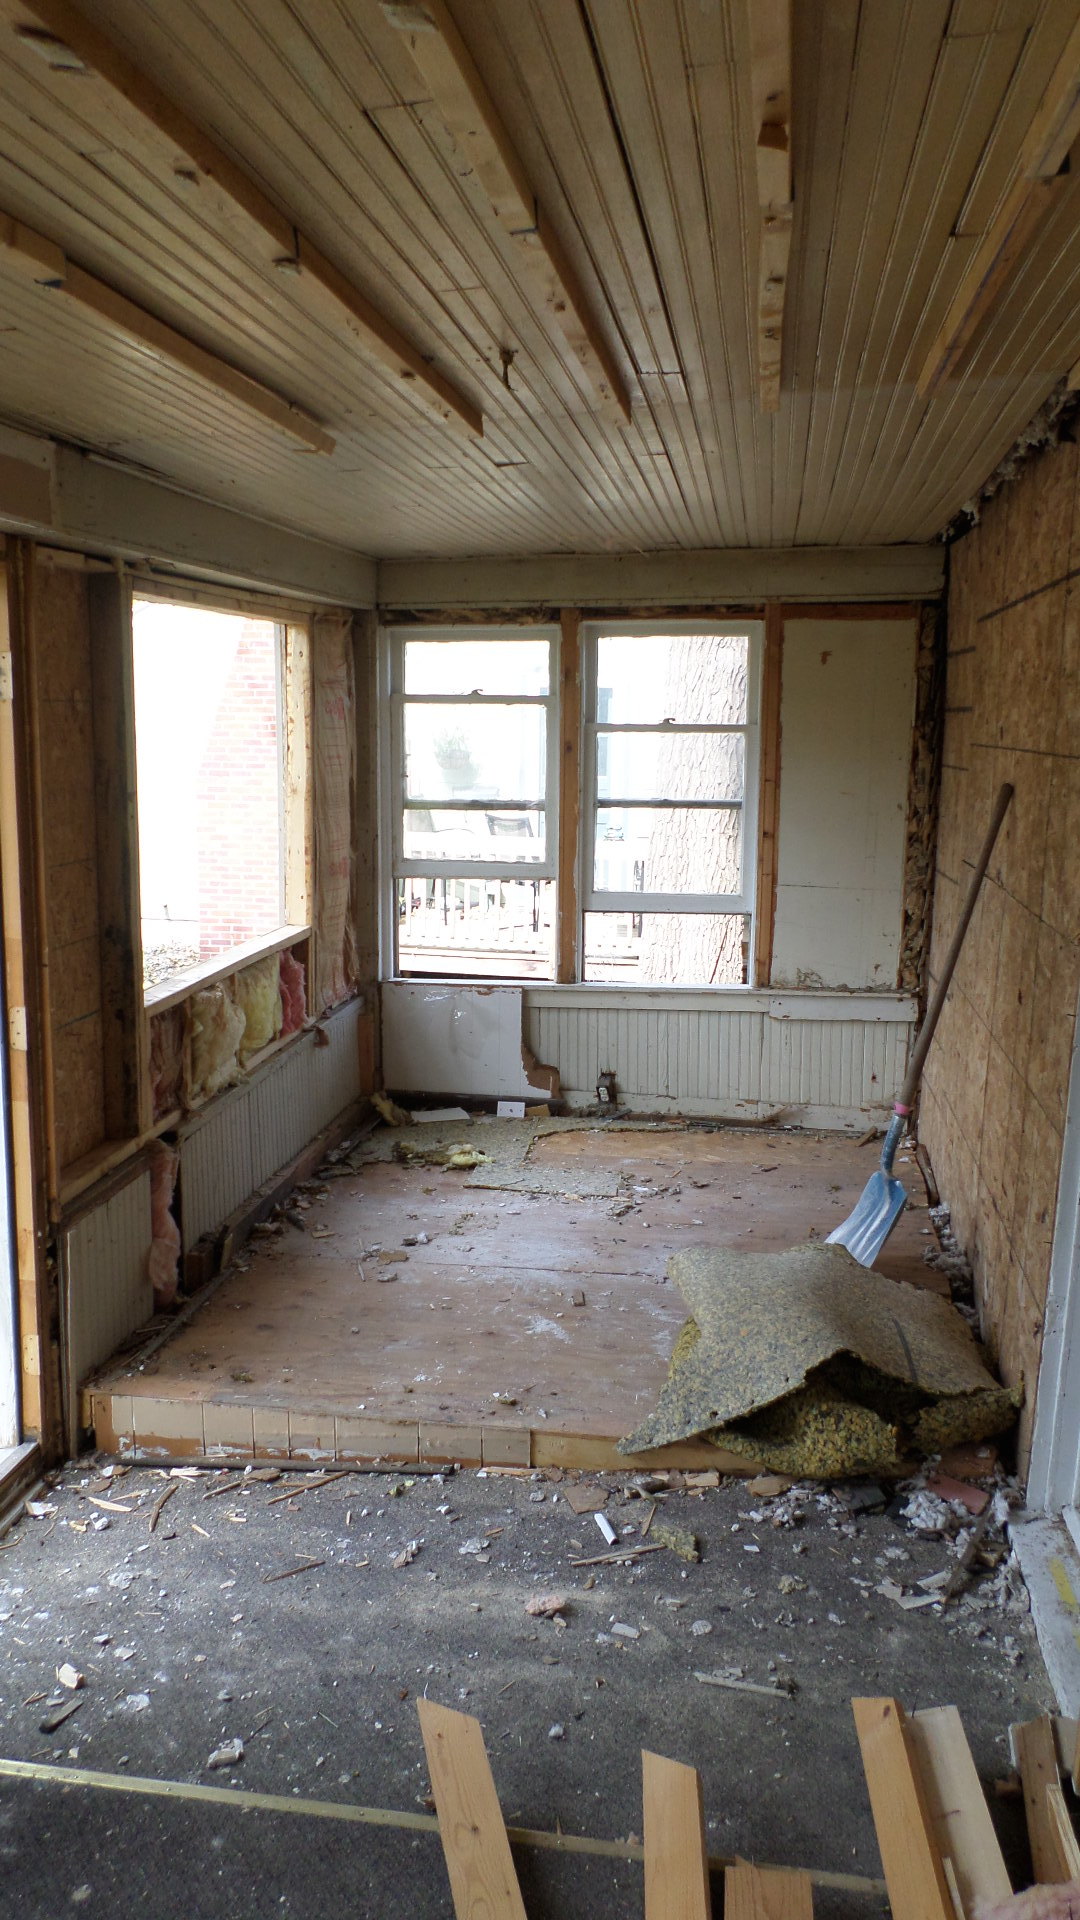
After the studs were up, we put up some temporary sheathing to close up the house and we started the demo of the front porch. I had already taken as much of the re-usable siding off the porch walls as I could, since we are not sure if we can get the same siding again.
Usable siding materials removed.
It is too hard to explain what we found inside this porch while doing this demo, but suffice to say, this home needs a lot of correction, removing this porch is the only way to correct this part of the house.
Old mudroom in process of being gutted.This section of the porch used to be part of the bedroom. Reconstructed wall visible on right-hand side.
At 7pm we started cleaning up because we have no light downstairs. Most of the interior of the porch was removed, the windows on the street facing side of the porch were taken out (these will not be re-used and I hope to find takers for them).
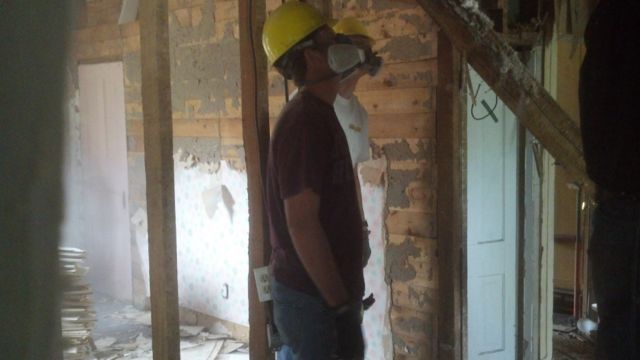
What a day today. We had six Tech students as demolition crew. They all showed up right on-time. After some instruction and goal setting, they went to work.
The crew started right away with the removal of the old appliances and movable objects. Soon thereafter the cabinets (which we deemed unsalvageable, with the exception of the cabinet door handles) were taken down and disposed of. The walls and ceilings were next. The assignment was to remove the plaster and lath. The studs and wall structure should remain.
This is where it got very dusty. All of the crew worked with respirators on and we refreshed the pre-filters once throughout the day.
The crew in the kitchen split up to start working on other rooms. Two remained in the kitchen, two went to the living room and two went to the dining room.
That beam was not supposed to look that way
By the end of the day we had a fully gutted kitchen, mostly gutted living room (see separate post about the beehive we encountered 🙂 , and partially gutted dining and guest room.
The debris that was collected throughout this day filled one 30 cubic yard for about 80+% and a second one for about 25%.
dumpster bin filled up and hauled away
All in all a tremendously successful day. Tomorrow two of the six students will return to help us and we also expect some friends and family to show up. This is such an exciting project!
We got the key this morning, which on its own was very funny, because none of the doors were actually locked. At around 9:30 we arrived at our home and started to set things up for the rest of the three days.
The plan is that we have a crew of 6 student from a local technical college help us with the removal of all the remaining loose stuff that is not ours and that we don’t want and then to remove all the kitchen cabinets and remove all the lath-and-plaster from the downstairs walls (interior and exterior-facing walls).
Anne kept us strict today to get the logistics setup. I personally would have liked to start the demo right-there and then, but I know tomorrow will be the day the walls come down 🙂
Here is an overview of what we found in the house that needs to be removed:
5 TVs
1 computer monitor
1 old fridge (also a newer one, but we’re keeping that one for now)
1 super nasty stove
3 natural gas-powered space heaters
We also found 2 gasoline powered lawn mowers, one of them even runs (I did not try the other one)
Can’t wait for tomorrow, I sure hope these tech students show up.
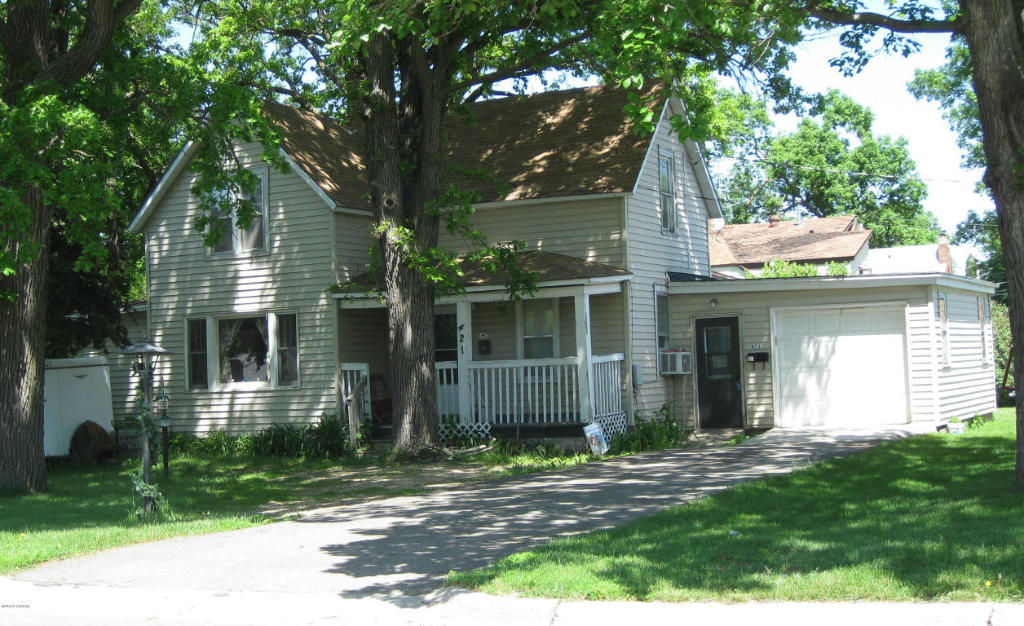
Big day for us. We finalized the purchase of our Dream Vacation Home, also known as a fixer-upper house on Kenwood Street.
Lovely greens in the side yard.
The house has been a rental property over many years, the prior owner lacked respect for the property by not maintaining it, therefore the tenants did not respect it either. This is the type of home we love to rehab. The picture above is probably the most flattering image of the home. Below is the video of the walk-through the day before we closed on the purchase of the house.
Hello and Welcome to our Vacation Home project website.
Some people think of vacation as a way to relax and enjoy time together, away from the hustle and bustle of day-to-day life. Anne and I agree that vacation should be about spending quality time together, but we don’t do the ‘relax’-part very well. Instead we like to remodel homes.
We therefore decided to buy a fixer-upper home in Minnesota and play with it.
Keep an eye out on this page to see the most recent developments, the project has only just started and we are excited to share the planning, the progress, and the results with you.
-Edwin
Restoring a 1890 Shingle-style home to its former glory